
The N300RT Totolink is a multi-port Wi-Fi router that allows you to create an efficient wireless network in both concrete-walled multiroom apartments and office buildings.
Preparing for setup
- Connect a network cable from your ISP to the WAN port.
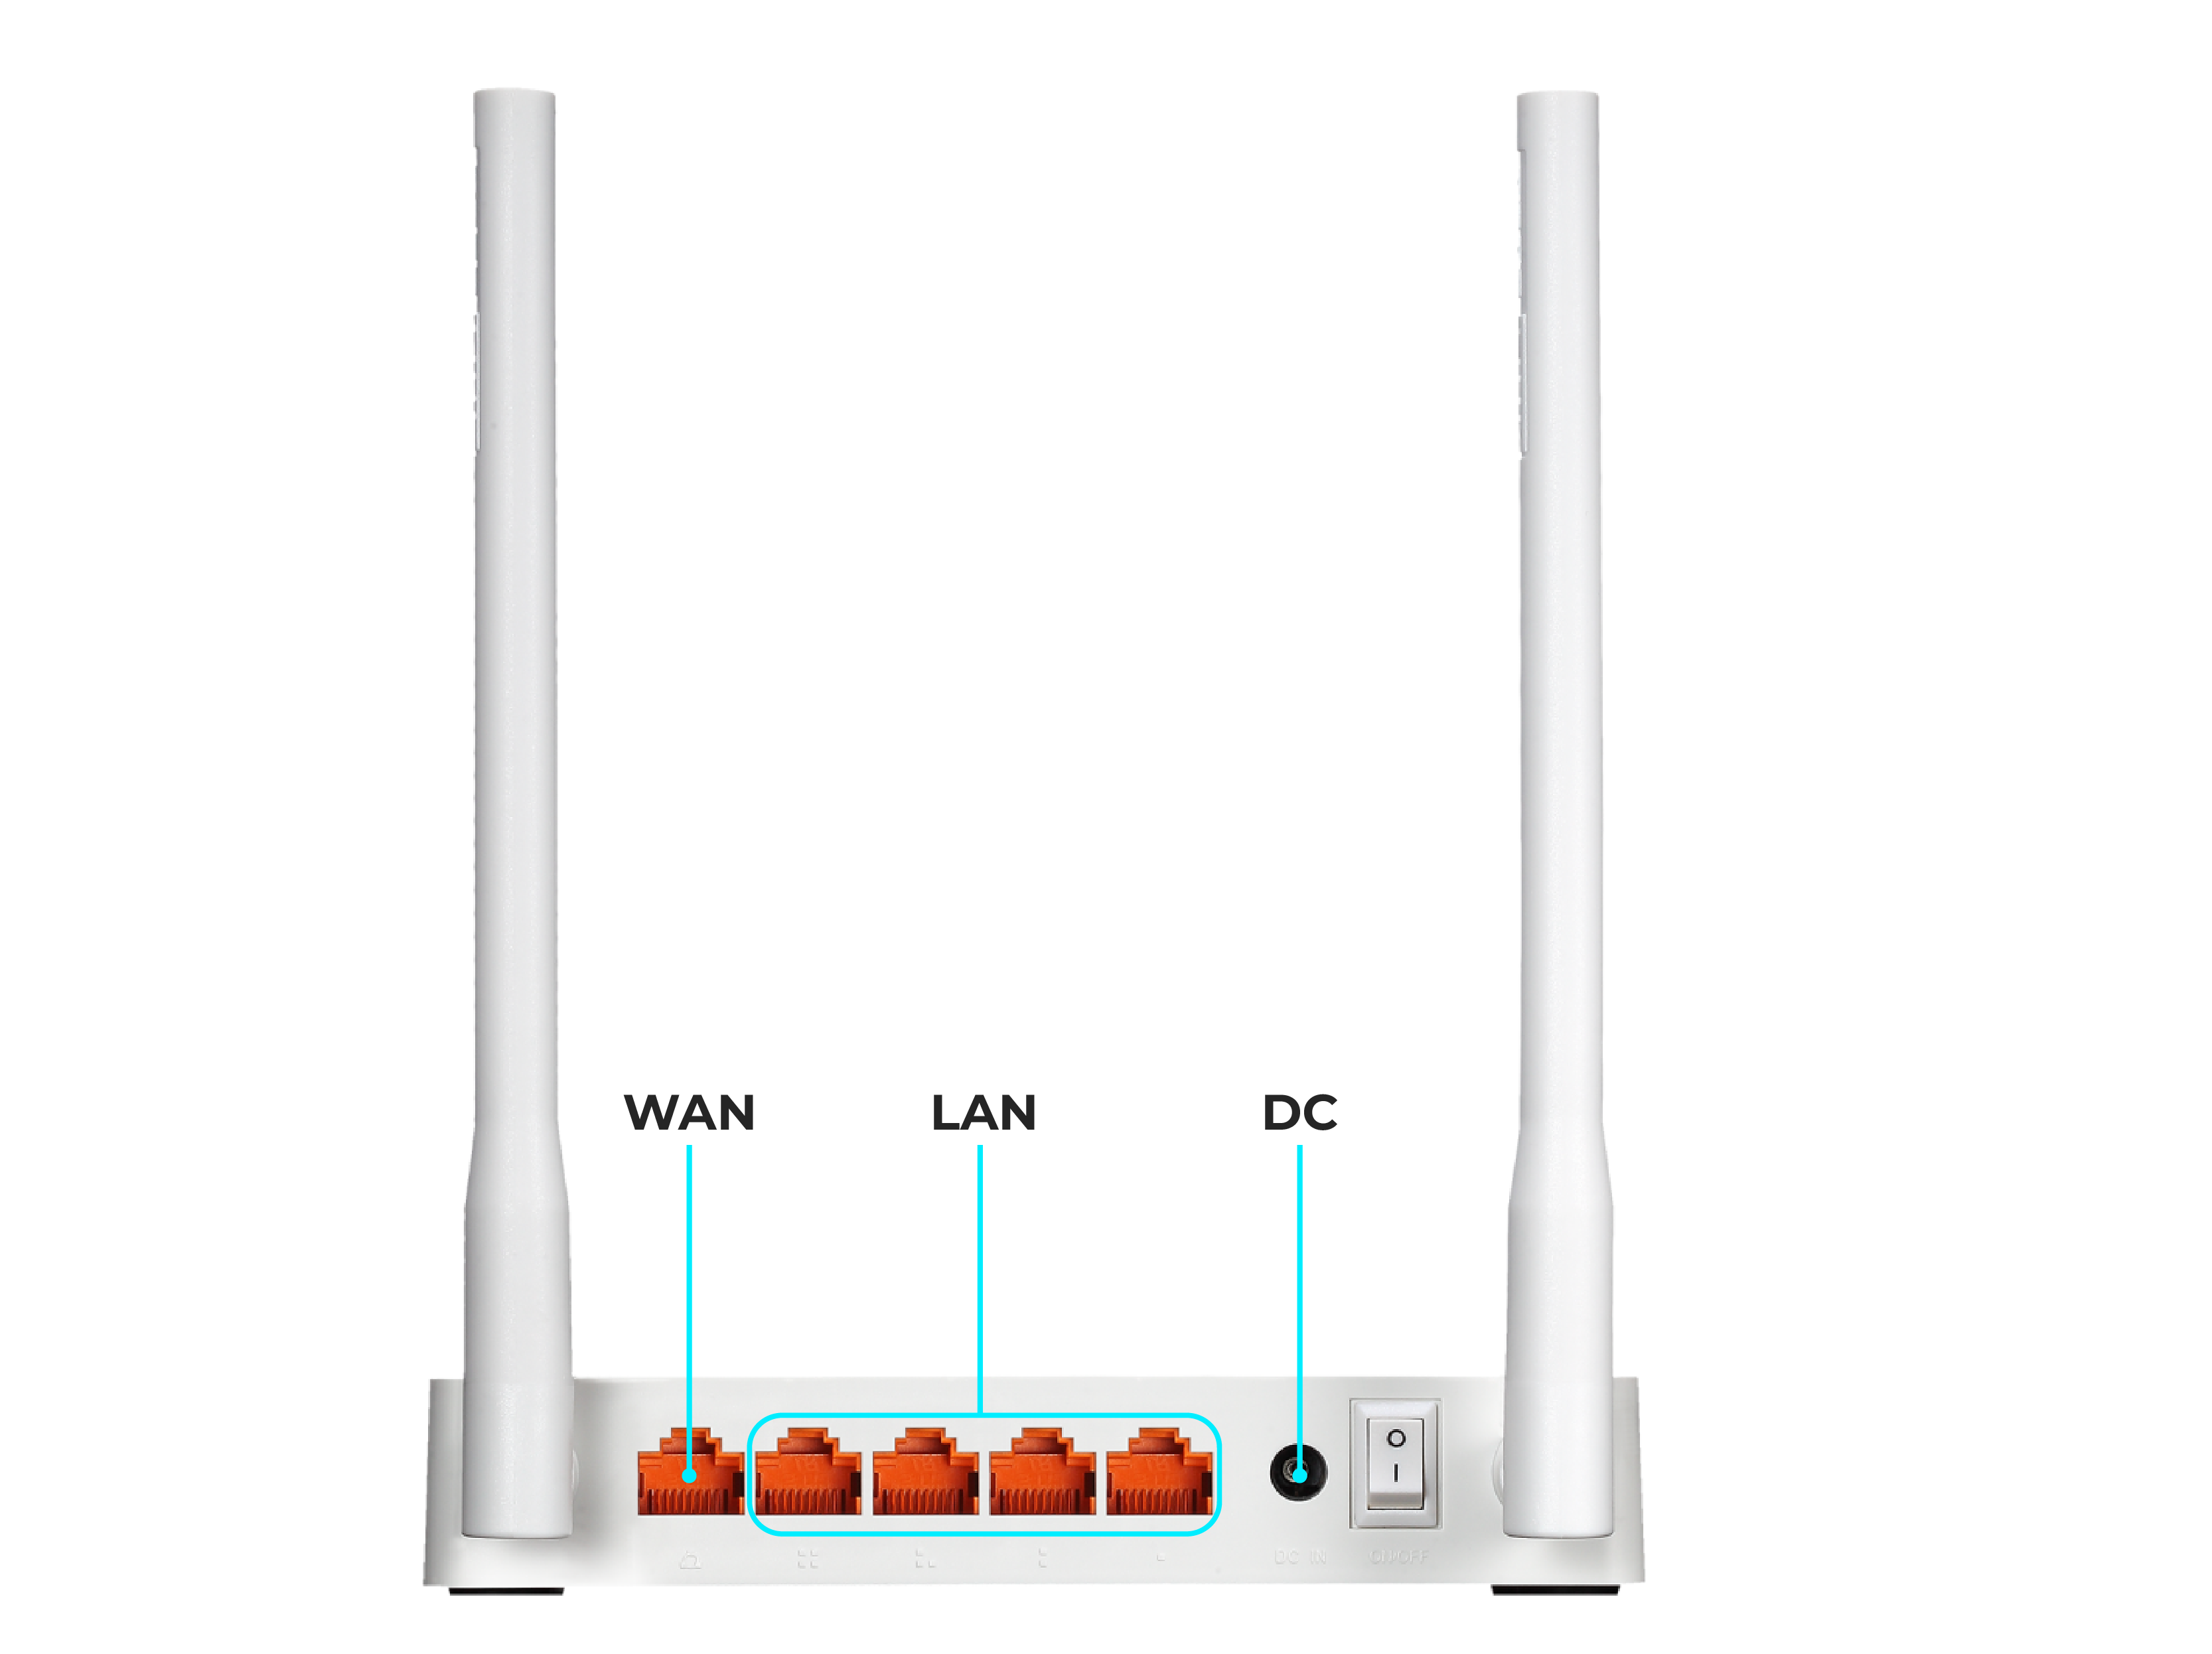
- If you plan to configure the router via a Wi-Fi network, turn on Wi-Fi in the settings of your laptop, tablet or phone. From the lists of available Wi-Fi networks, select TOTOLINK_N300RT (the network will be one of the first in the list and will not be password protected).
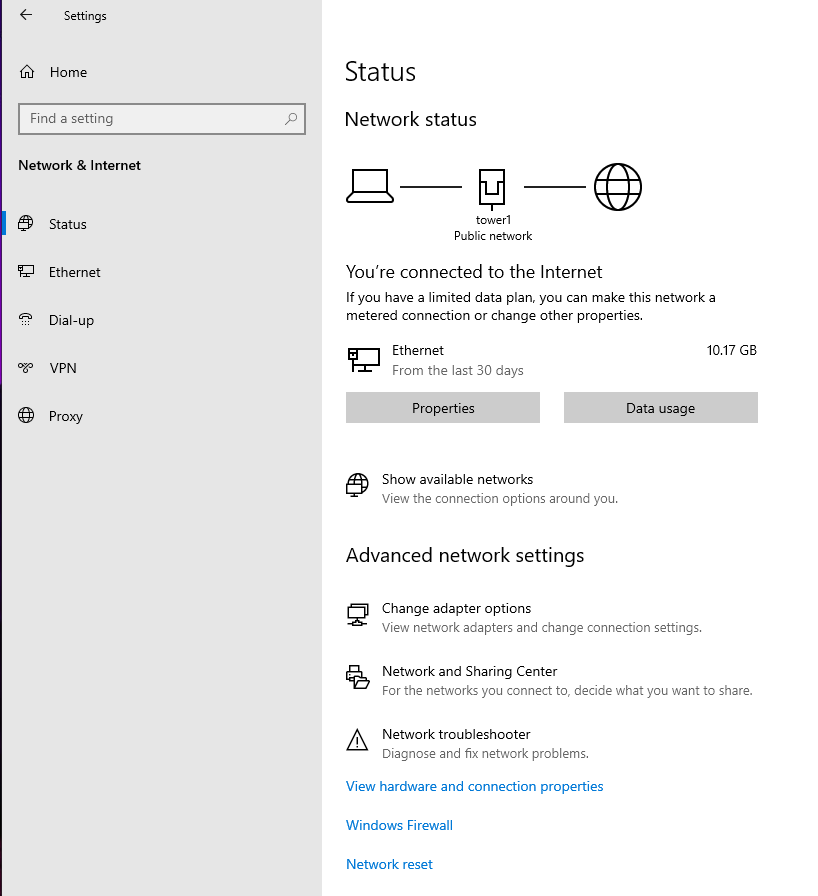
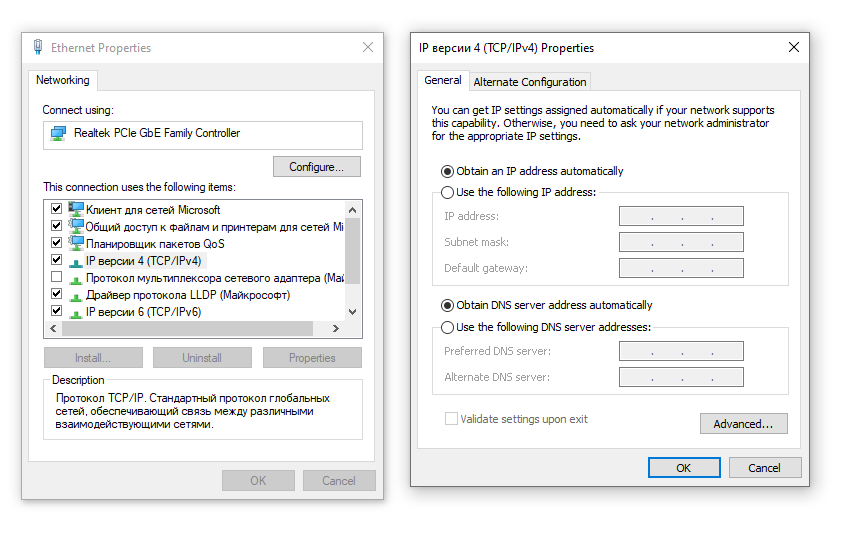
- If the router is not configured via a W-Fi network, connect the patch cord cable (it is included with the router, or you can use any other twisted pair cable) to the computer's network card and any of the router's LAN ports. Make sure your network card settings are set to automatically acquire an IP. To do this, select «Start» - «Settings» - «Network and Internet» - «Ethernet» - «Properties».

- Open a browser on your device and enter the IP address «192.168.1.1» into the address bar without quotes (be careful, the browser can independently substitute Latin l instead of the number 1. Do not pay attention to this and enter the address manually). In the dialog box, enter the administrator's login and password without quotes (login: «admin», password: «admin»), and the captcha from the picture below in the confirmation code.
- If the router has already been used, it could have been previously configured and the Wi-Fi network may have a different name, be password protected, or at the address 192.168.1.1 you cannot get into the web interface of the router, or the administrator password does not match. In this case, the easiest solution is to reset the router to factory settings. To do this, hold down the WPS / RESET button on the front side of the router for 10-15 seconds, then wait a minute until the router reboots.

Setting up access to the «Internet»
- Choose a convenient language and go to «Additional settings».
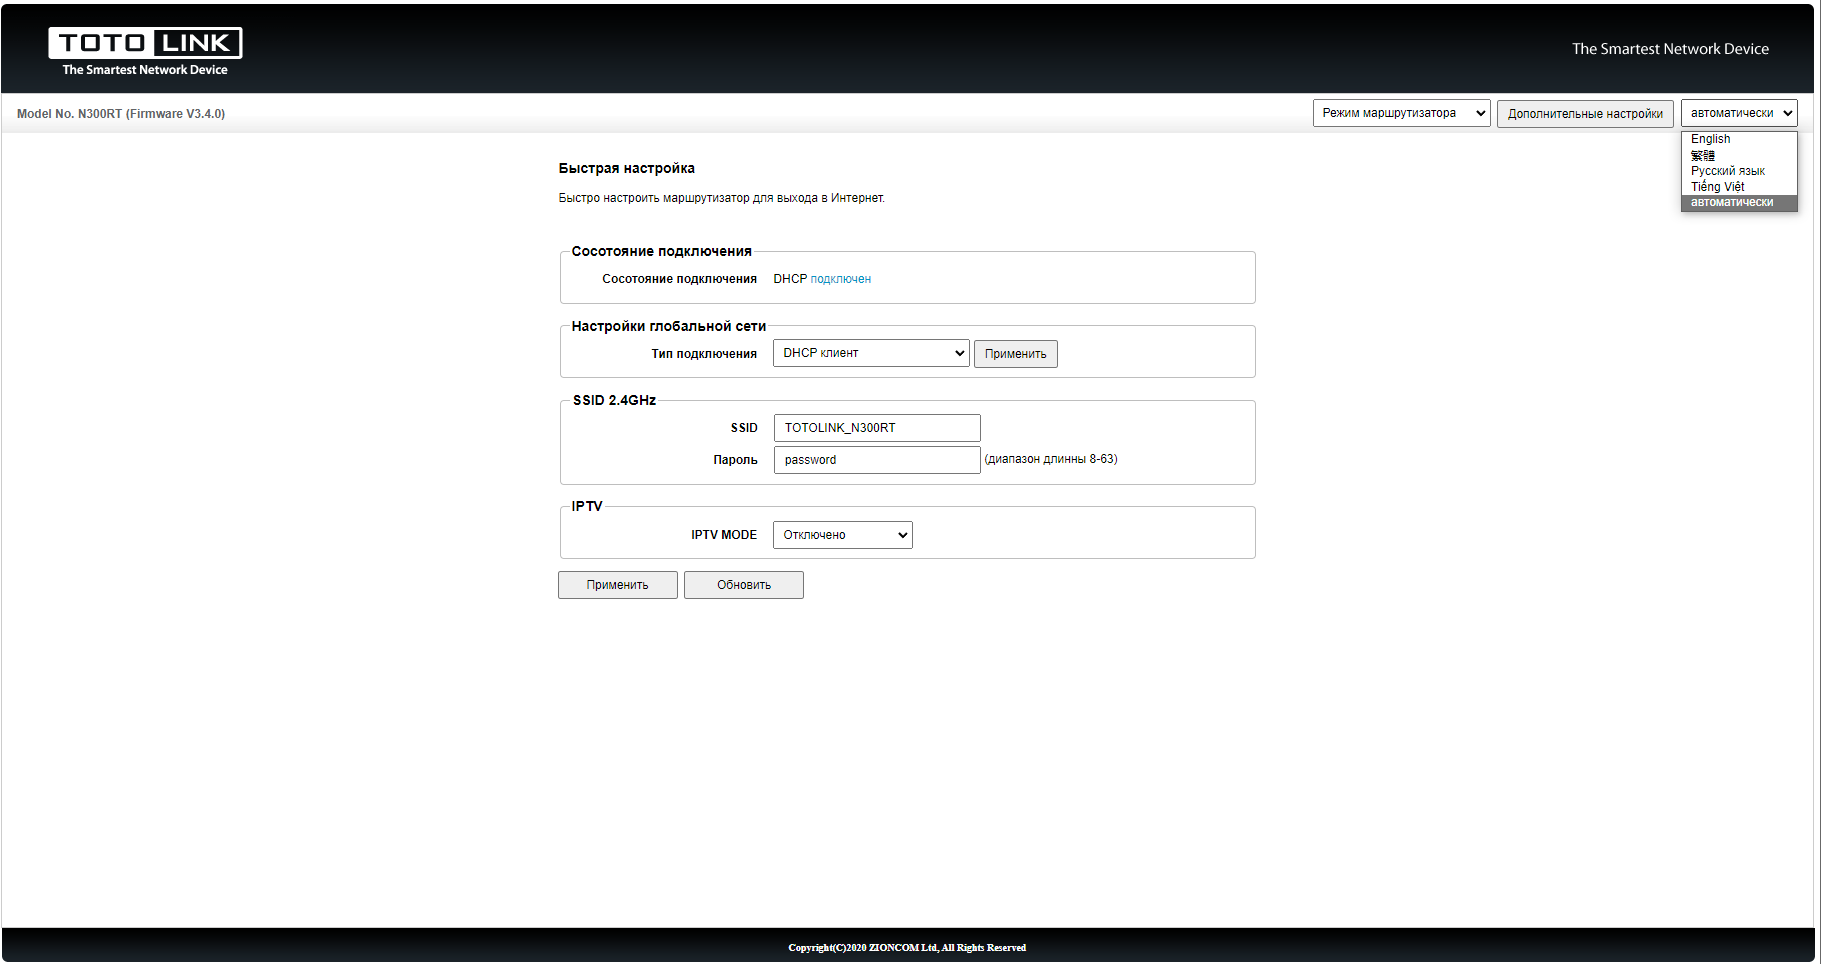
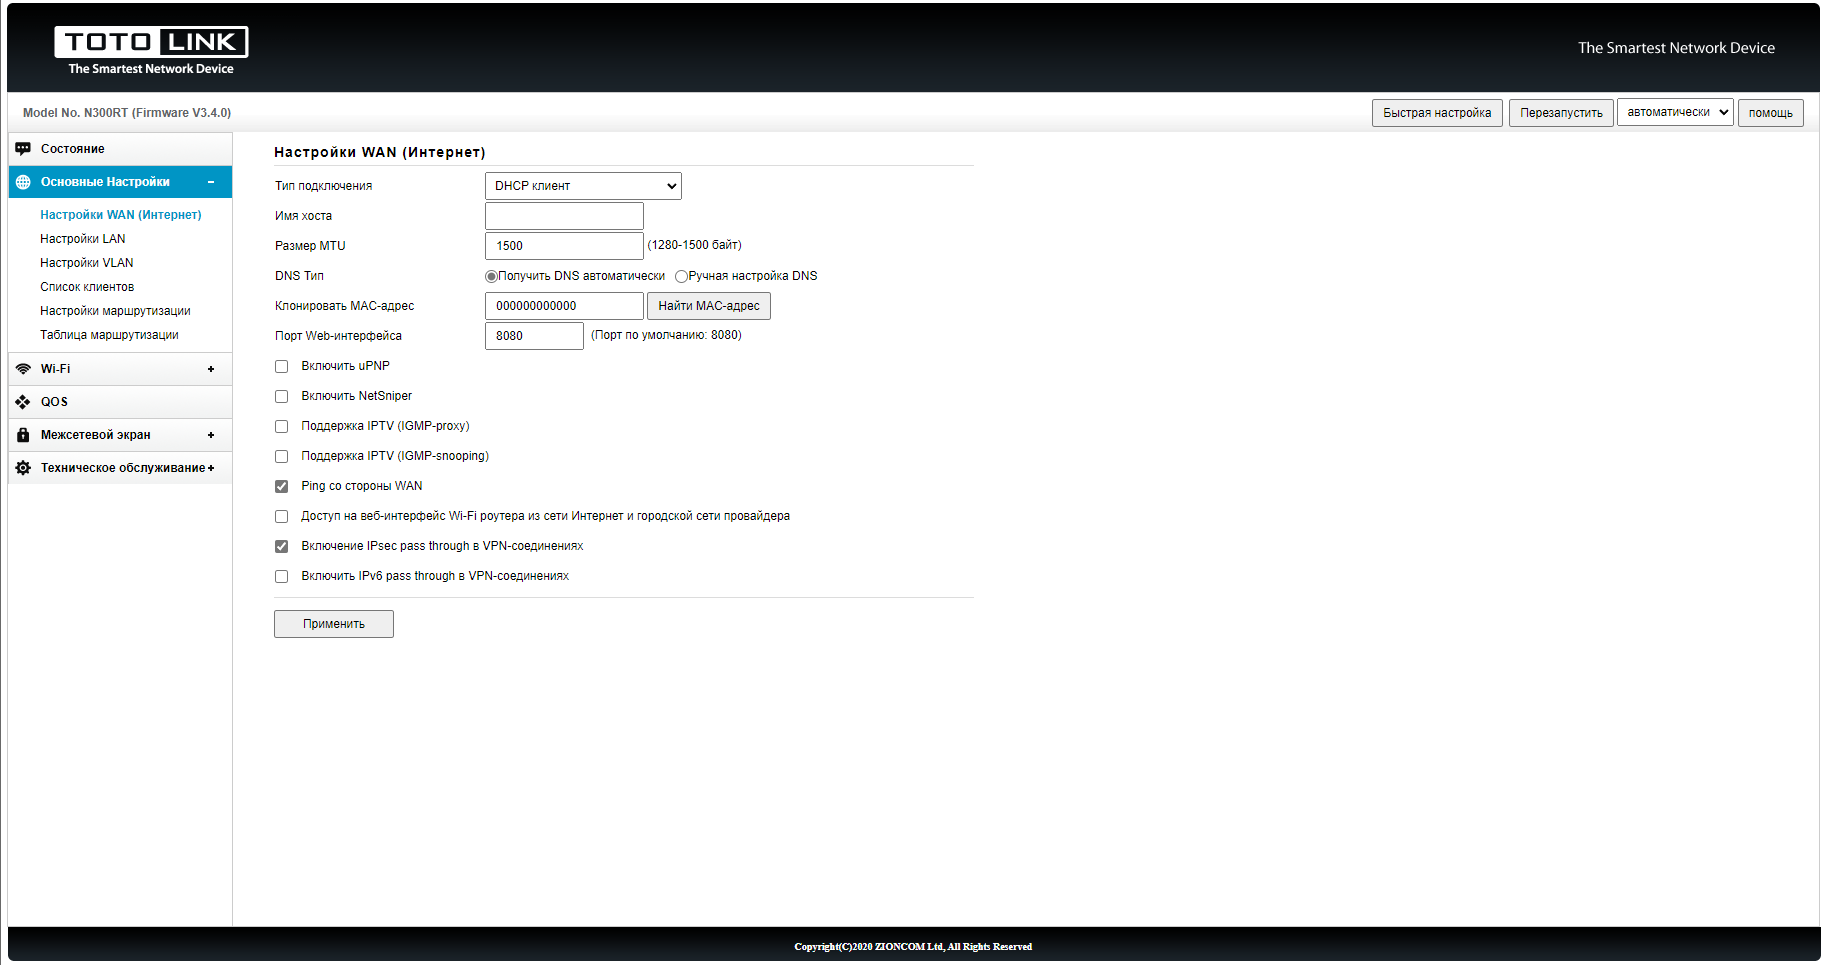
Click «Basic Settings» → «WAN Settings». In the «MAC Cloning» field, enter the MAC address assigned to your connection, without separators (the MAC address can be found in your account in the «Services-> Internet» section), and click «Apply» below. Leave the connection type as DHCP and disable IGMP-proxy and IGMP-snooping. After saving the settings, Internet access will already be present.
Setting up a wireless network Wi-Fi
- To configure the Wi-Fi network, go to the «Wi-Fi» → «Wireless Security section».
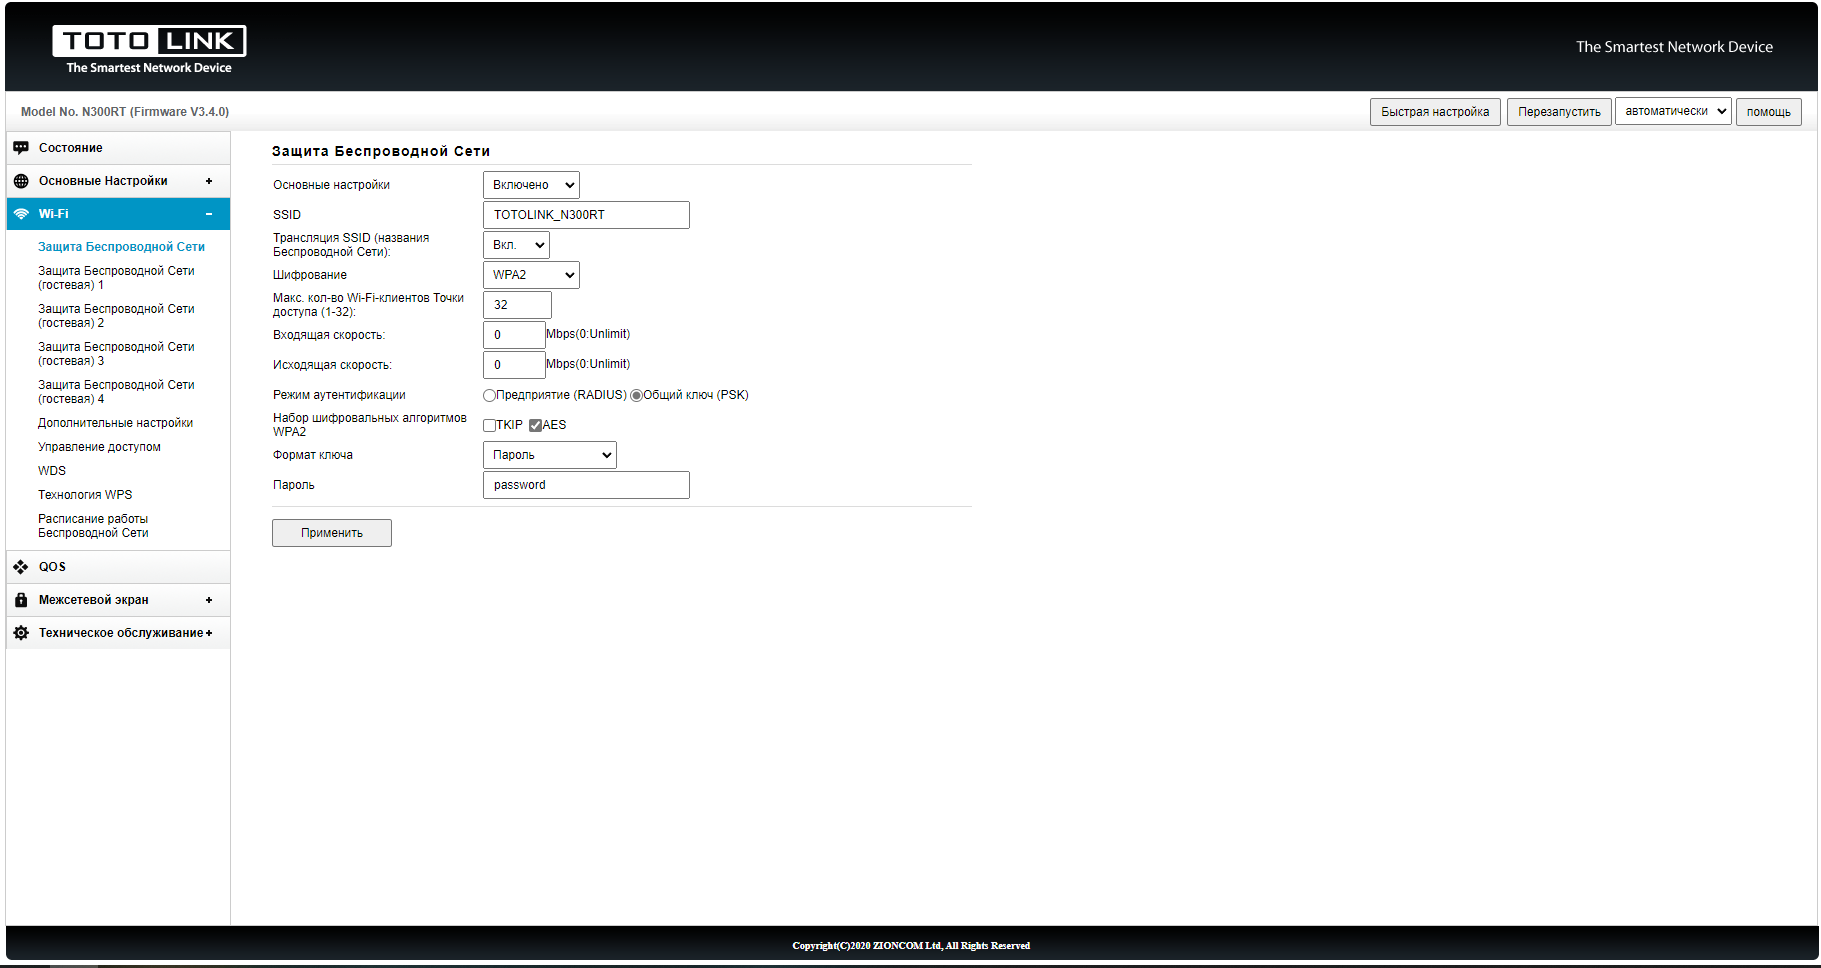
- Enter the network name in the SSID field and the Wi-Fi access password.
- Authentication mode, select «PSK pre-shared key».
- Click «Apply». If you configured the router by connecting to it via Wi-Fi, after saving the settings, you will need to connect to it again using the new password.
- It is also advisable to change the administrator password (this is the same «admin» that we entered to enter the web interface). To do this, go to the «Maintenance» section and click on «Password Settings».
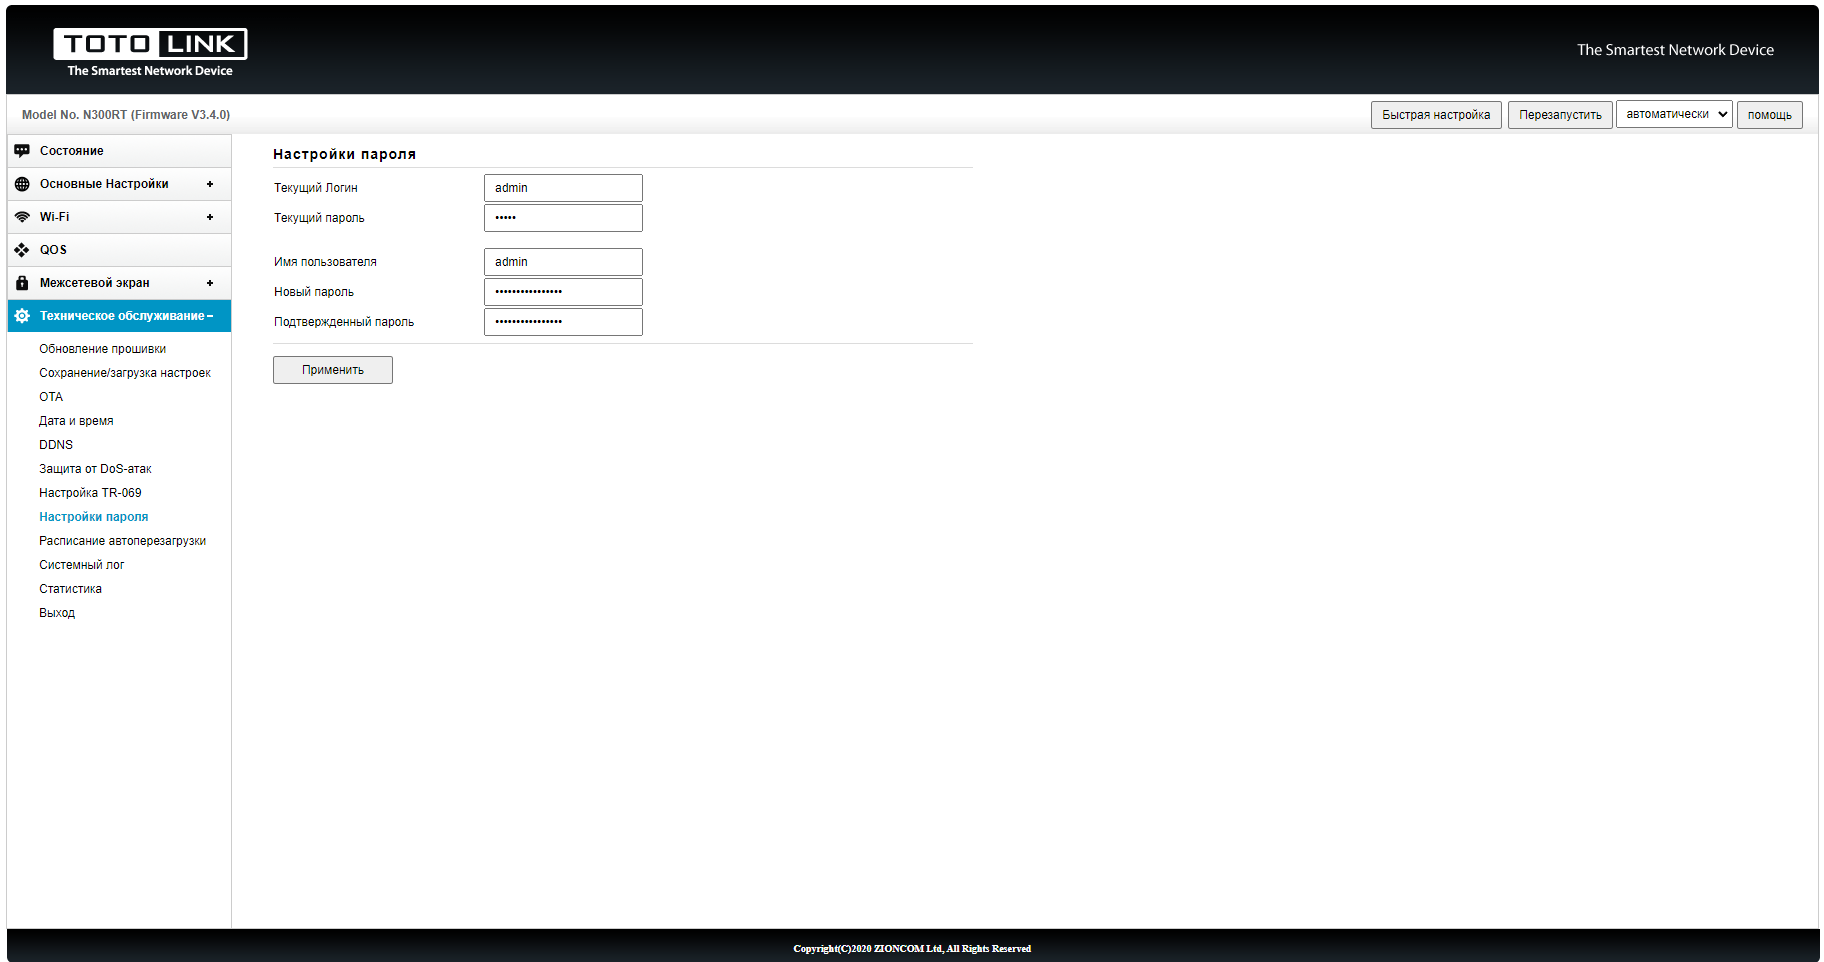
Important! Do not confuse the password for accessing the Wi-Fi network - this is the password that users will enter when connecting to Wi-Fi, and this administrator password - it is needed to configure the router and only you should know it.
Setting the system date
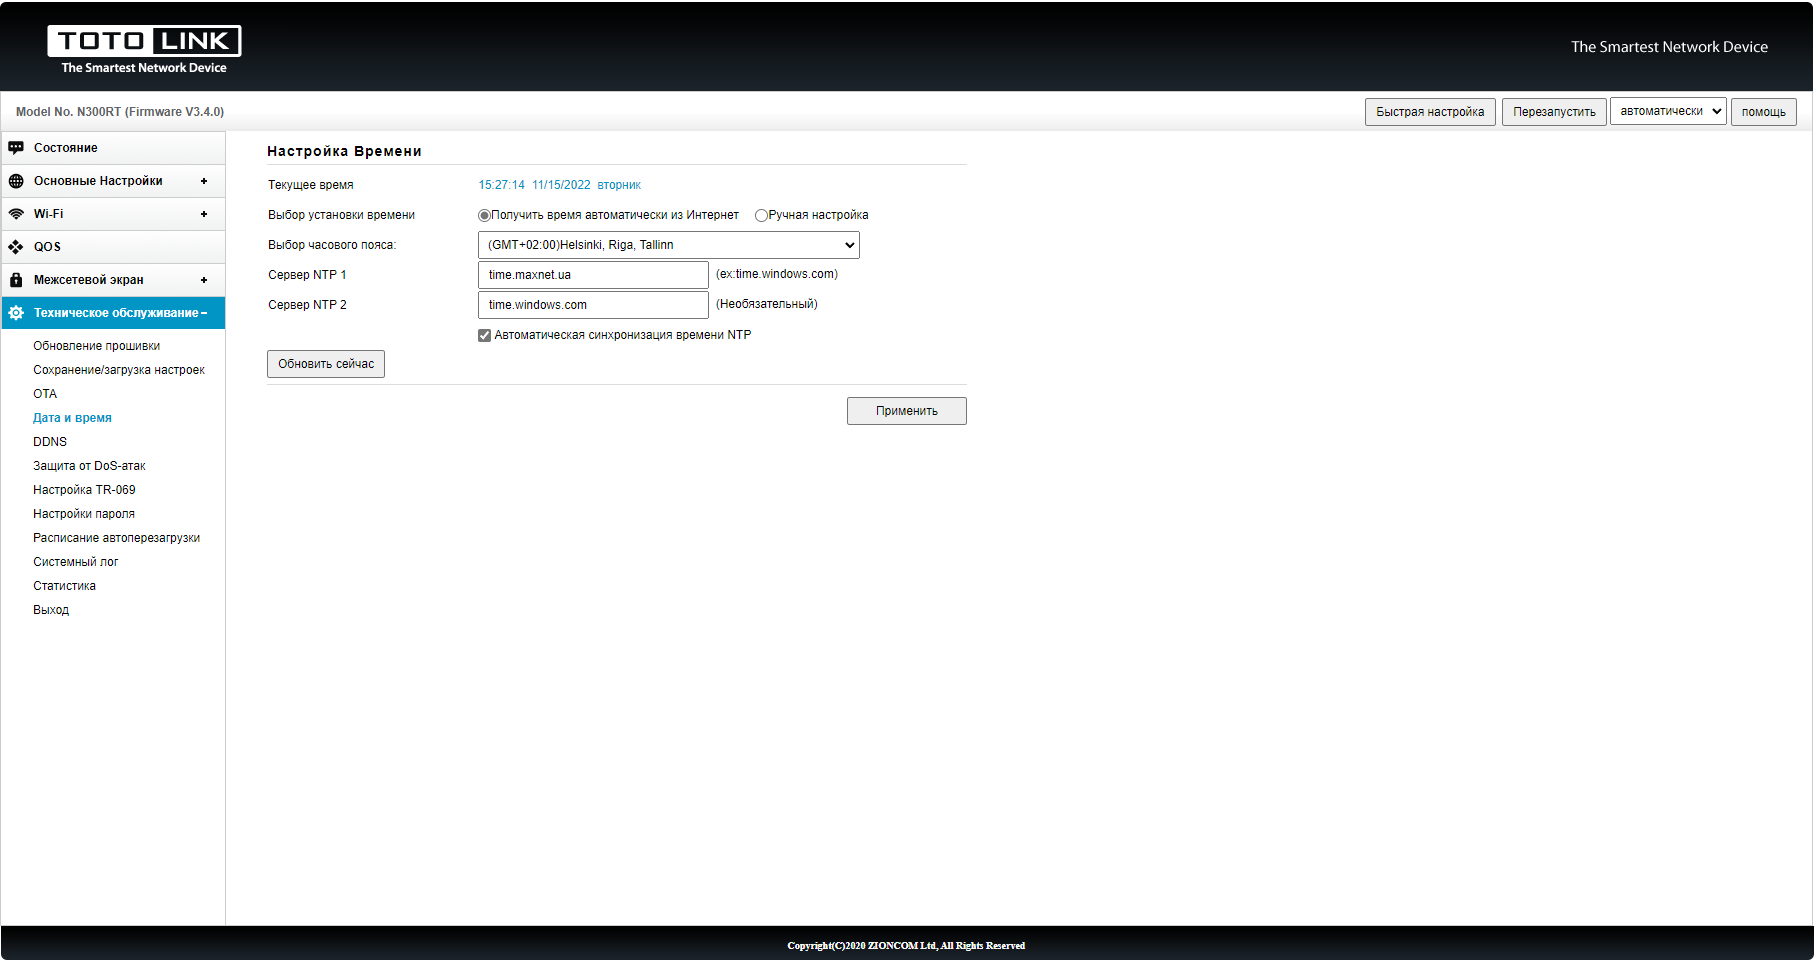
- To set the system date, go to «Maintenance» -> «Date and time» and specify the time zone and one or two servers (you can use a server from Microsoft or Maxnet or others), for example, as in the screenshot below. Click «Apply» and «Update Now».
More comments


Надія
01.05.2025
0
0
Reply
Макснет
02.05.2025
0
0
Reply
Дмитрий
03.12.2022
6
0
Reply