
If your operating system is running slow and you are using a hard drive, its defragmentation may help to solve the problem. If you suspect that your internal drive is malfunctioning, the right solution is to use SMART testing.
What SMART HDD is and why it is needed
SMART is a system built into hard disk drives (HDD) and solid state drives (SSD) that monitors and analyses various drive parameters to detect potential problems. The name stands for “self-monitoring, analysis and reporting technology”.
HDD parameters check performs a number of functions:
- Warning of possible malfunctions.
SMART parameters allow you to detect problems with a disc before it fails. This helps you take action in time to prevent data loss. For example, if a drive begins to show signs of decreasing speed or frequent errors, this can signal future problems.
- Monitoring disc health.
SMART parameters include various metrics such as number of sector rewrites, disc temperature, run time, and others. Monitoring these metrics helps you assess the overall health of the drive and detect any abnormalities.
- Early error detection.
Some of the parameters that are monitored by SMART can show that the disc has physical problems, such as deteriorating sectors or problems with mechanical parts. This enables you to take timely action, such as backing up important data.
- Productivity optimisation.
Evaluating SMART parameters can also indicate that a drive requires maintenance or cleaning to keep its productivity at an optimal level.
- Planning for hardware replacement.
If SMART parameters indicate a significant decline in drive health, this may be a signal that the drive needs to be replaced. This allows you to plan for HDD replacement before the drive stops working completely, reducing the risk of data loss and system crashes.
Windows 10 has a number of built-in tools with which you can quickly diagnose the state of your computer's internal drive and identify potential malfunctions. Let's take a look at the main ones.
Determining possible HDD malfunctions with the help of the Command line application
To analyse if your computer's hard drive has any problems, you can use the command line console.
Determining the status of the disc
To do this, you need to perform the following sequence of actions:
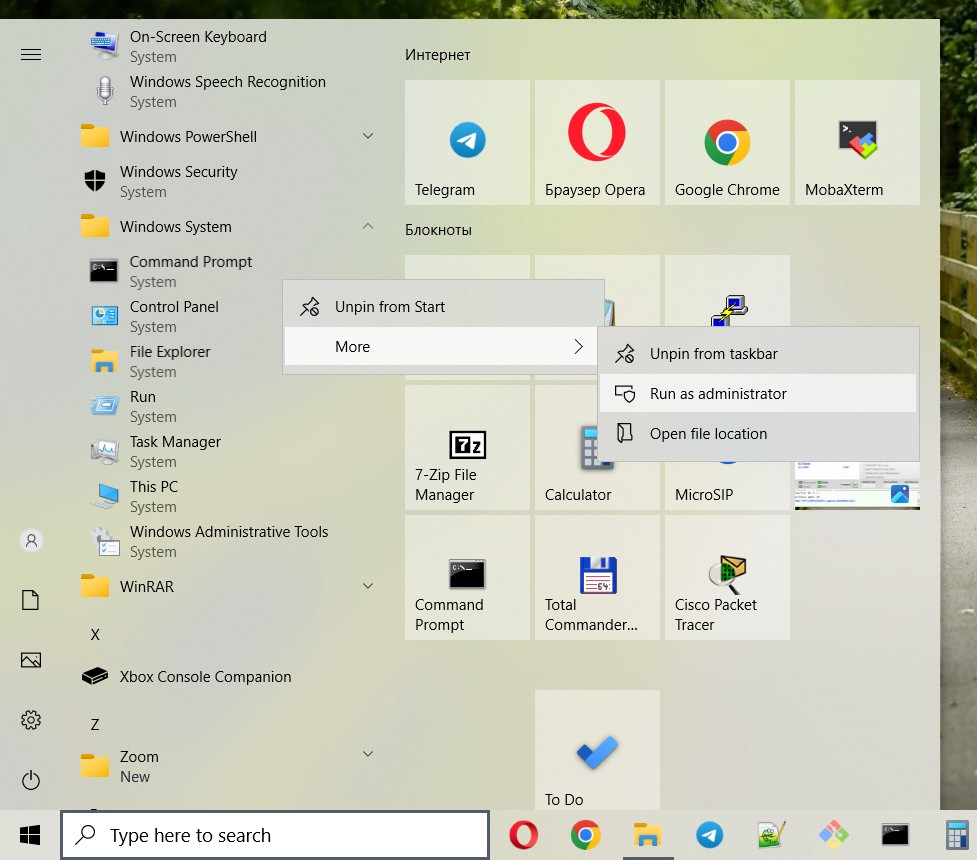
- Open the command line console with privileged rights in any way you want, such as this:
- 1.1. Click on the “Start” button on the Taskbar and open the “Windows” menu.
- 1.2. In the list that appears, find and open the “Windows System” section.
- 1.3. In the list of available tools, find and right-click on the “Command Prompt” section.
- 1.4. In the context menu window that appears, click on the “More” section and open a new submenu where you can select the “Run as administrator” section from the available options.
- In the window that opens, enter the following command in the corresponding line:
wmic diskdrive get status.
Then press the “Enter” key on your keyboard.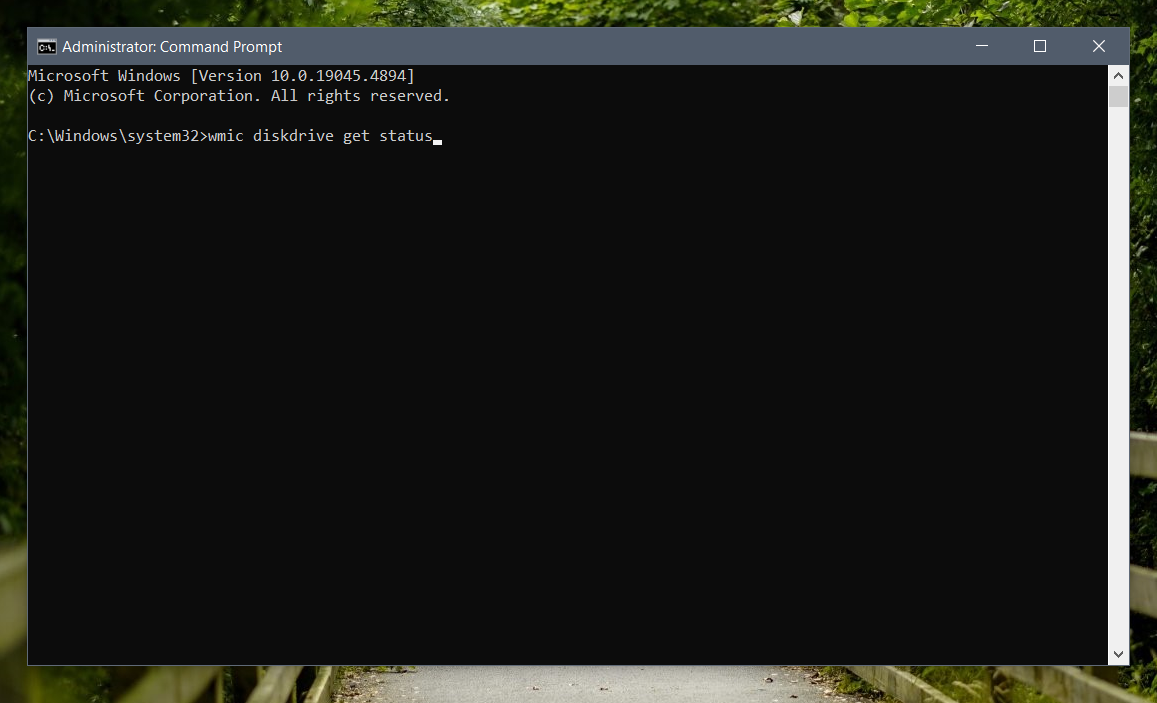
- After the Windows 10 service has analysed the final result will be displayed in the “Status” column. “OK” in the status of each internal drive installed in the computer means that their condition is completely fine.
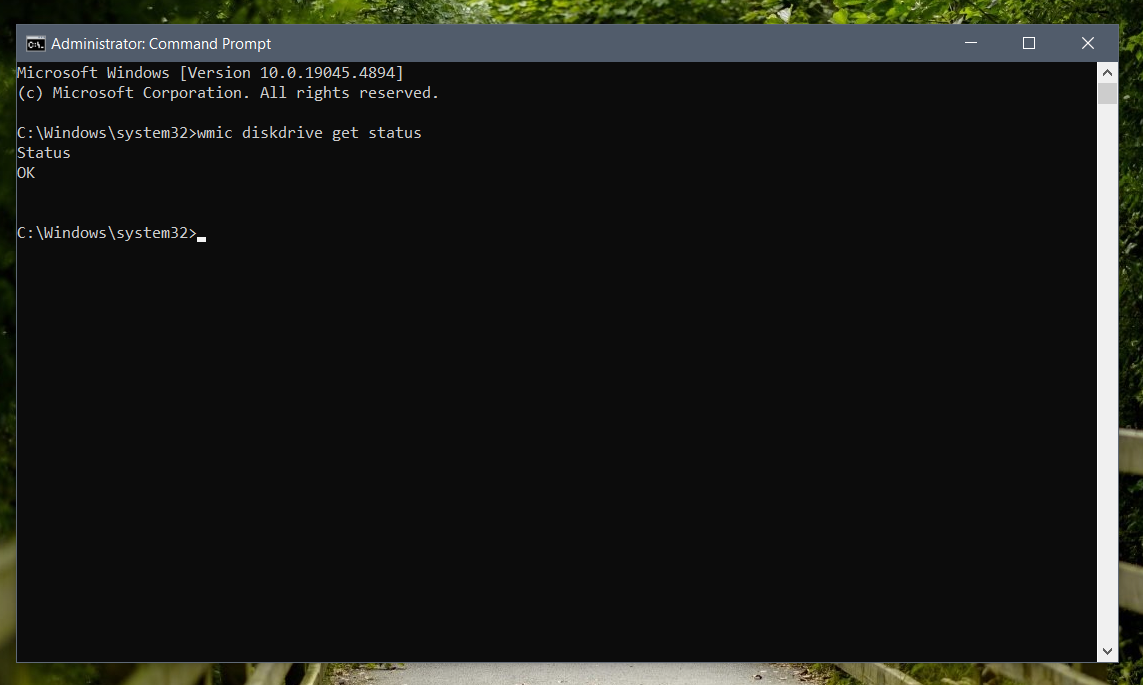
If the status indicates any other result (such as “bad”, “unknown”, or “caution”), this indicates that a hardware failure on the hard drive is imminent, or that the team is having trouble accessing the drive's firmware, which could lead to further malfunction. Therefore, being aware of any of these errors is a signal to back up your files.
Determining the foreseeable failure of the storage device
To check the predicted status of possible error development, to anticipate possible failure of the storage device and to determine whether HDD starts to fail, you need to perform the following algorithm of actions:
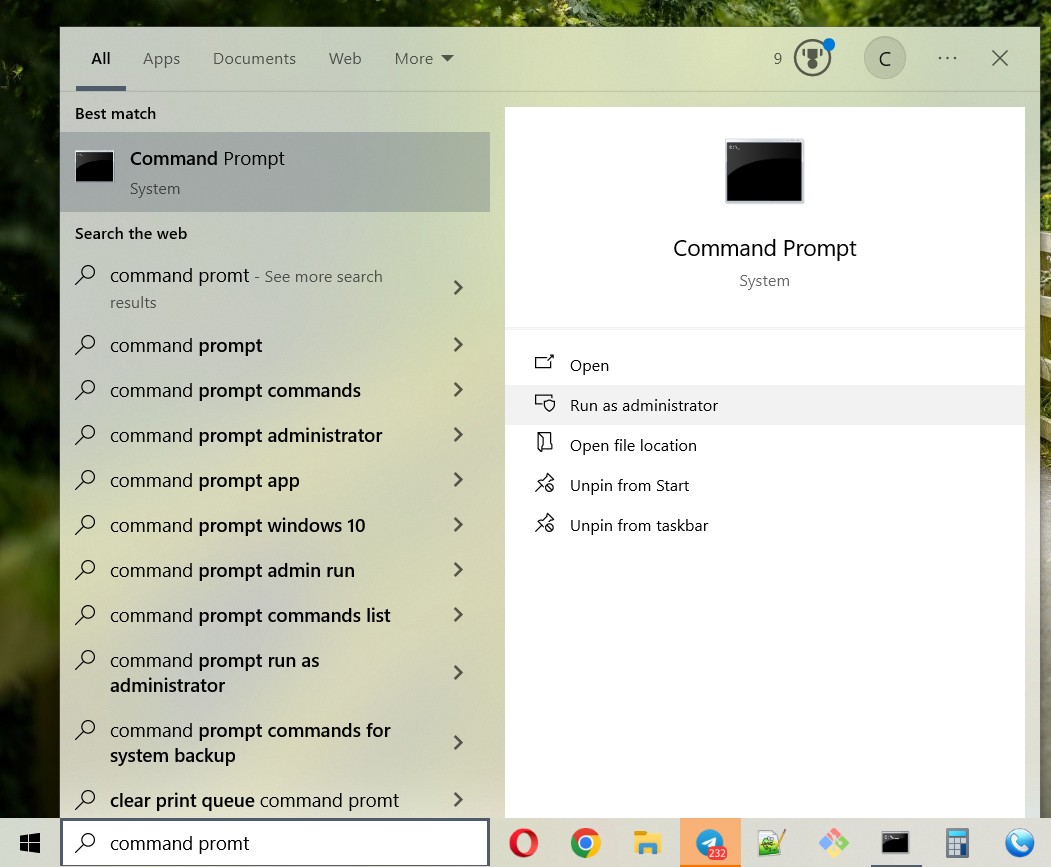
- Open the command line console with extended privileges in any way you like, such as this:
- 1.1. Click on the “Search” button in the lower left corner of the screen on the Taskbar and open the search bar.
- 1.2. Enter the phrase “Command Prompt” in the appropriate field.
- 1.3. After the searched result is displayed in the “Best match” section, right-click on it and select “Run as administrator” from the list of possible actions in the pop-up context menu window.
- In the window that opens, enter the command:
wmic /namespace:\\root\wmi path MSStorageDriver_FailurePredictStatus
and press the “Enter” key on your keyboard.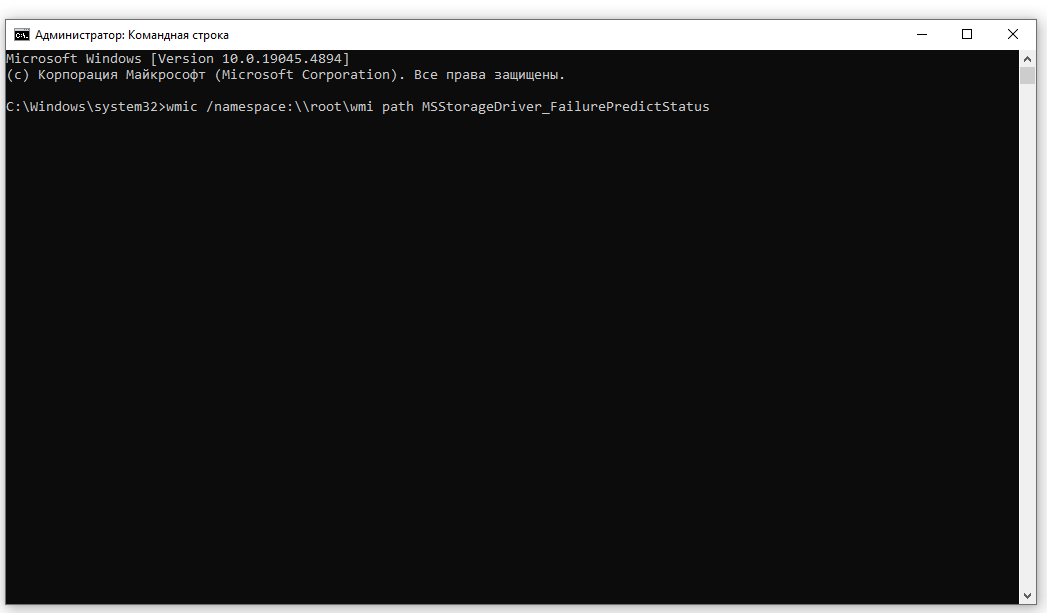
- After the final result appears, check the value in the “PredictFailure” column. If the final status is displayed with the characteristic “FALSE”, it means that HDD works correctly.
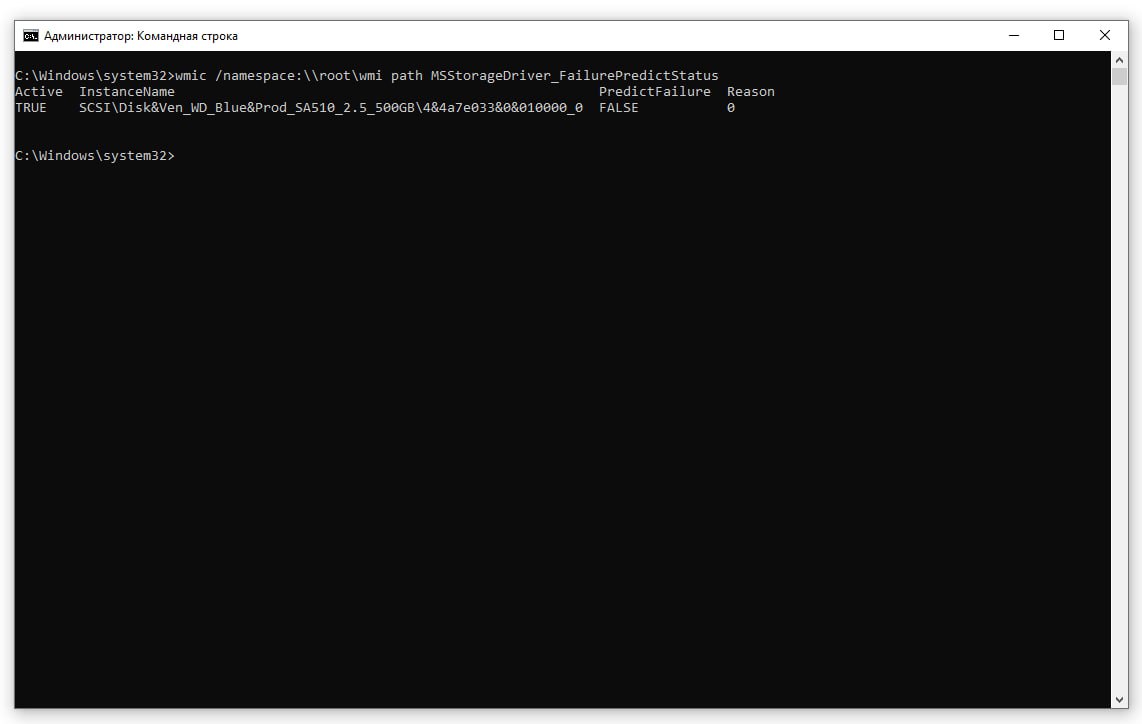
If the final status is displayed with the characteristic “TRUE”, it means that “SMART” suggests a quick failure of the hard drive, so you need to pay special attention to it and take care to save the information.
The “Reason” column may also display a numeric value greater than zero. In this case you should contact the manufacturer of the device to decipher the code, as this value is individual.
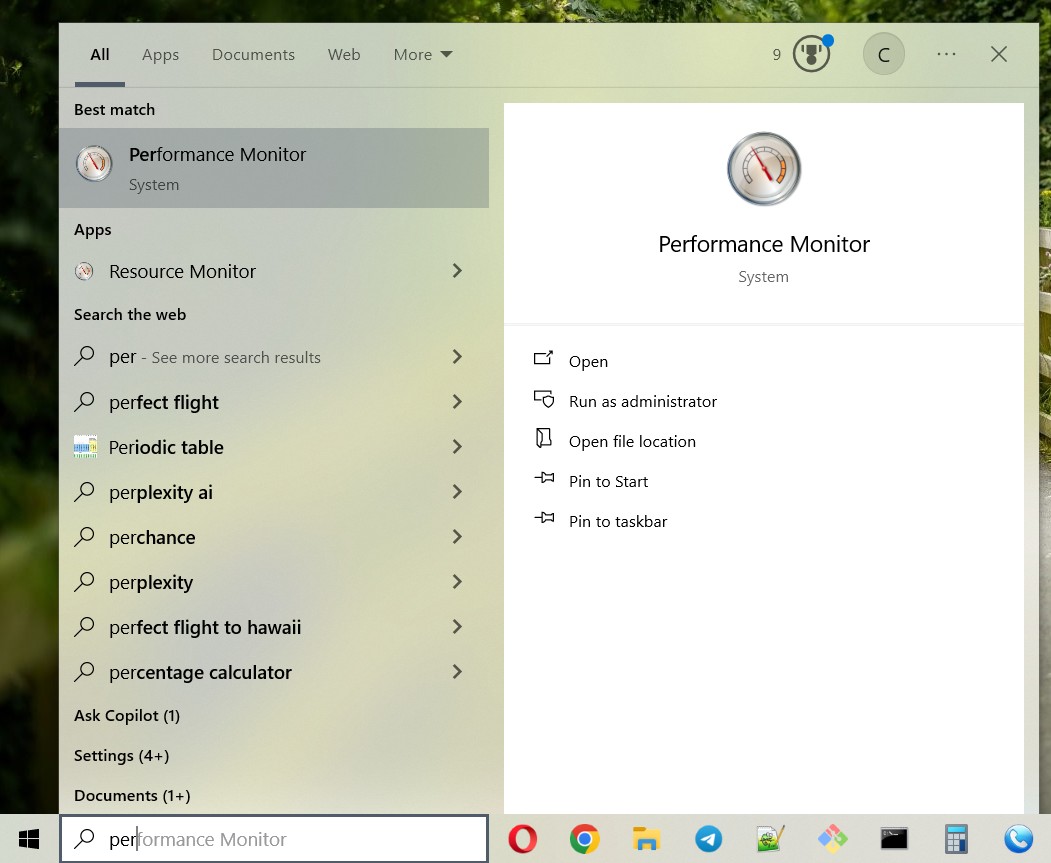
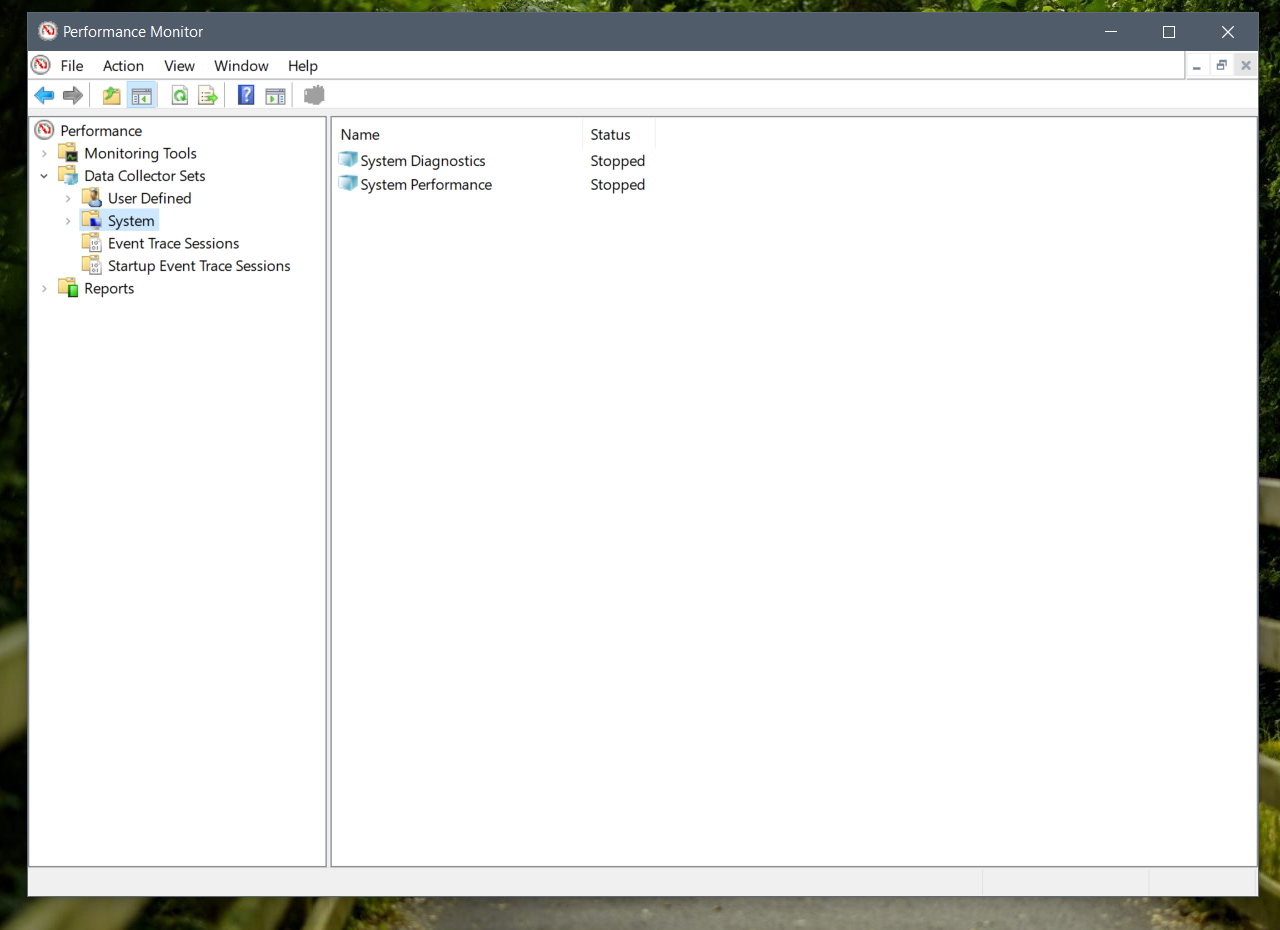
Evaluate HDD status using the Performance Monitor application
To analyse performance and potential hard drive problems, you can use the System Monitor application. Here the algorithm of actions is as follows:
- Open the mentioned application:
- 1.1. Click on the “Search” button on the Taskbar at the bottom left corner of the screen and open the search bar.
- 1.2. Type the phrase “Performance Monitor” in the query box, and the responsible service will instantly display the desired application in the “Best Match” section.
- 1.3. Once the name of the desired application is displayed in the “Best match”’ section, left-click on it or click on the “Open” button in the right side menu of the search bar.
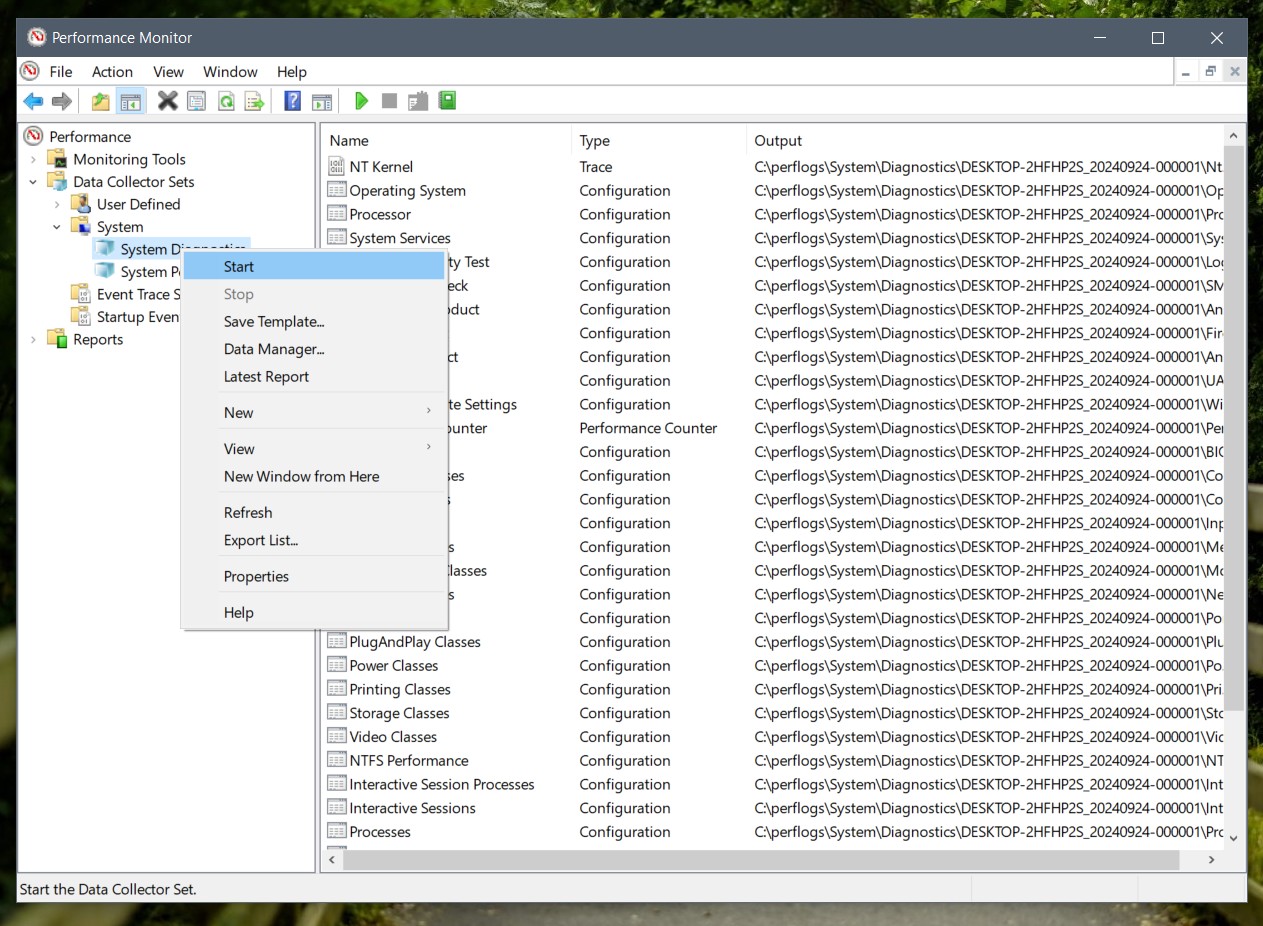
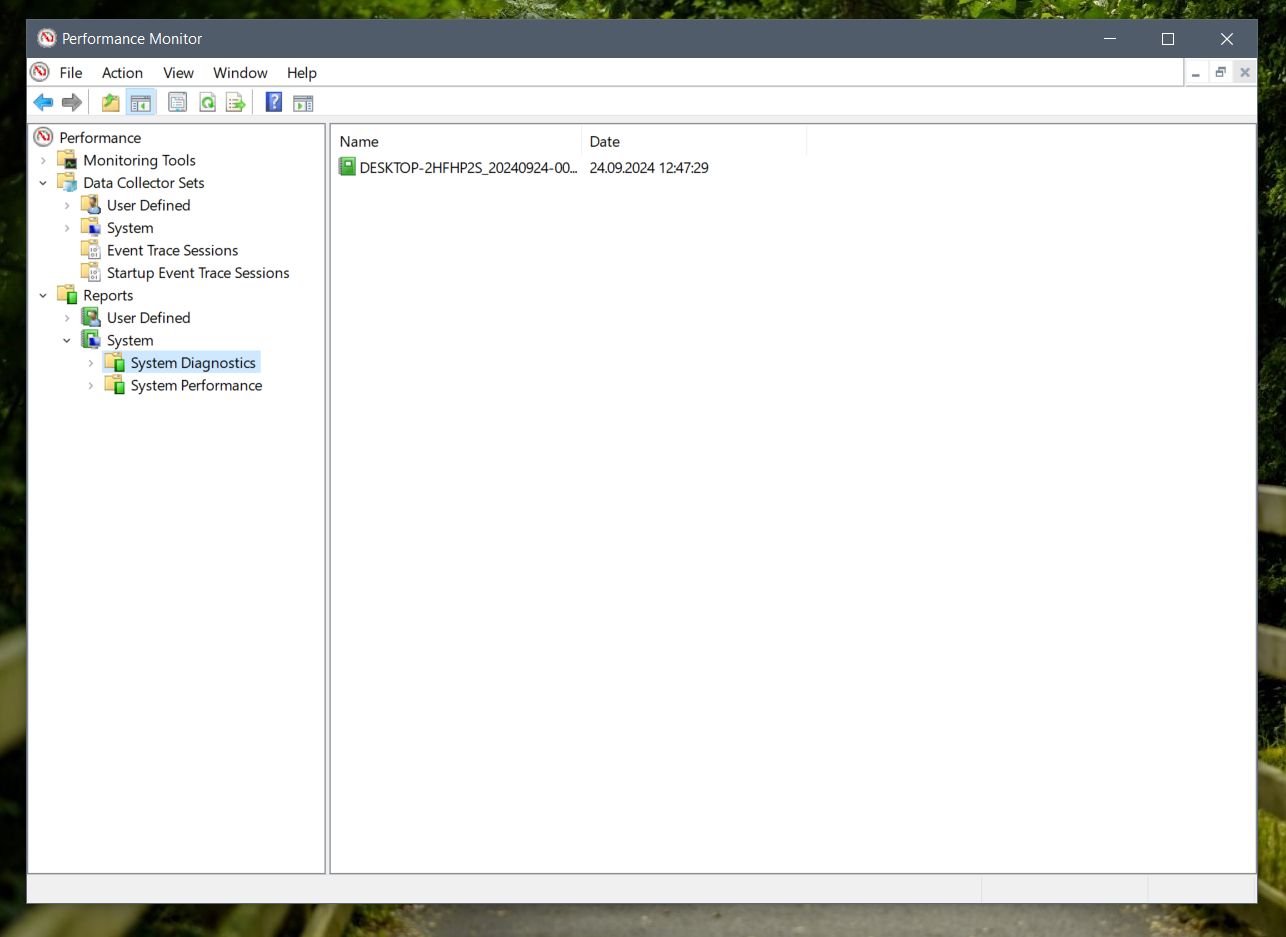
- In the left side control panel of the window that opens, click the right arrow icon in the row of the “Data Collector Sets” section to display the nested items.
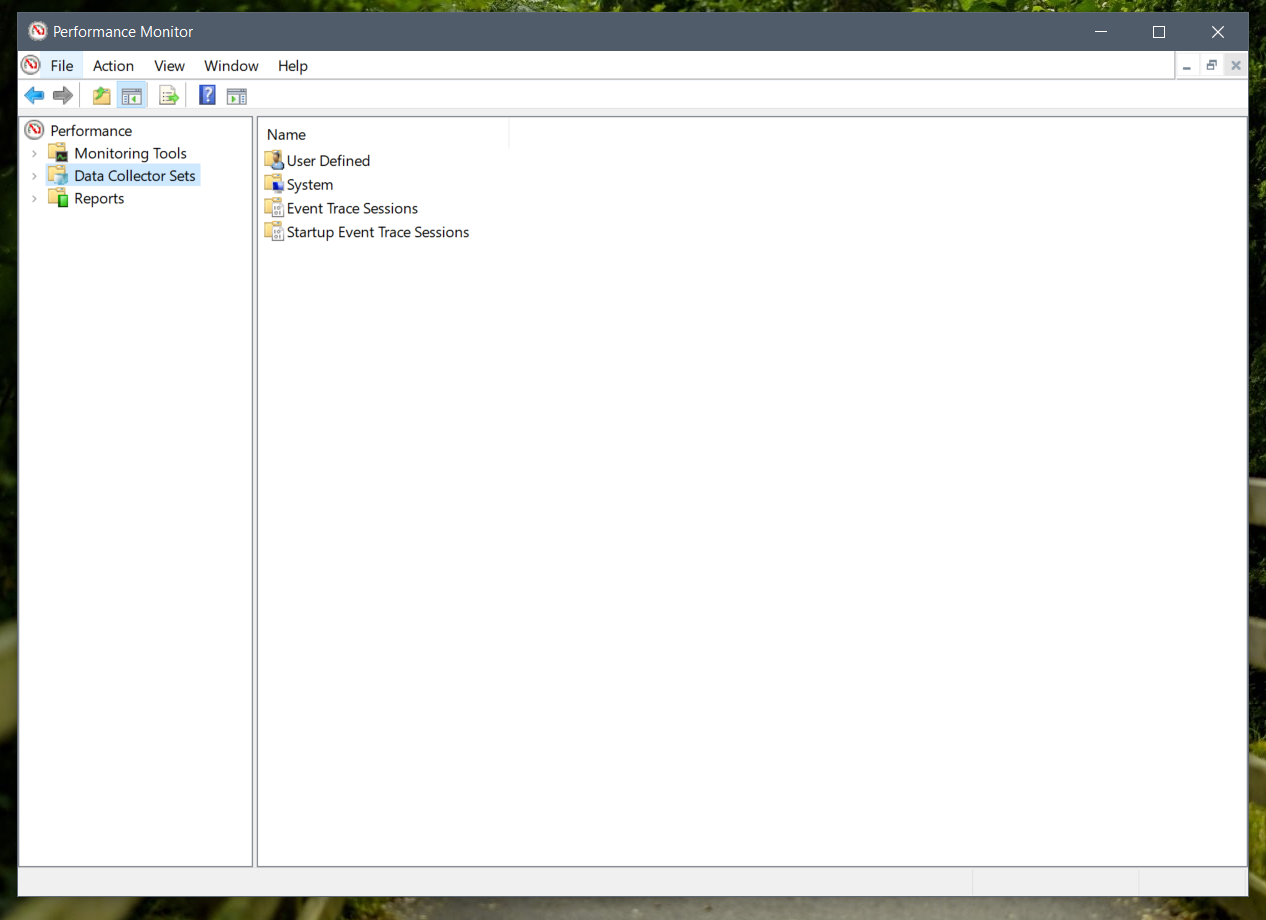
- In the list provided, open the "System" section by clicking on the right arrow icon.
- In this section, select the “System Diagnostics” tab from the available options and right-click on it. In the context menu pop-up window, select “Start” from the available options of allowed actions.
- To display nested items, click on the schematic “right” arrow and open the contents of the “Reports” section.
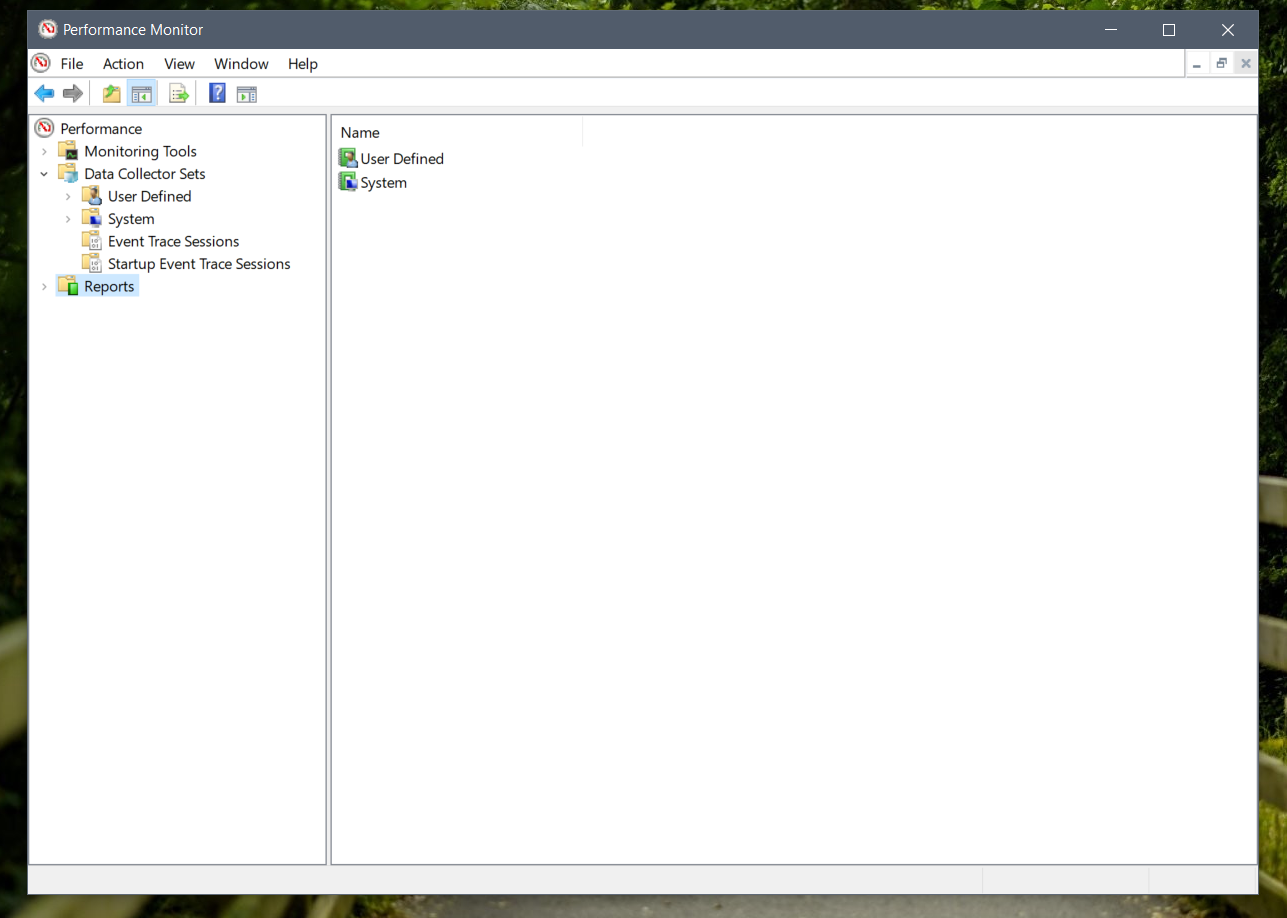
- In the list provided, find the "System" section and open its contents by clicking on the “right” arrow again.
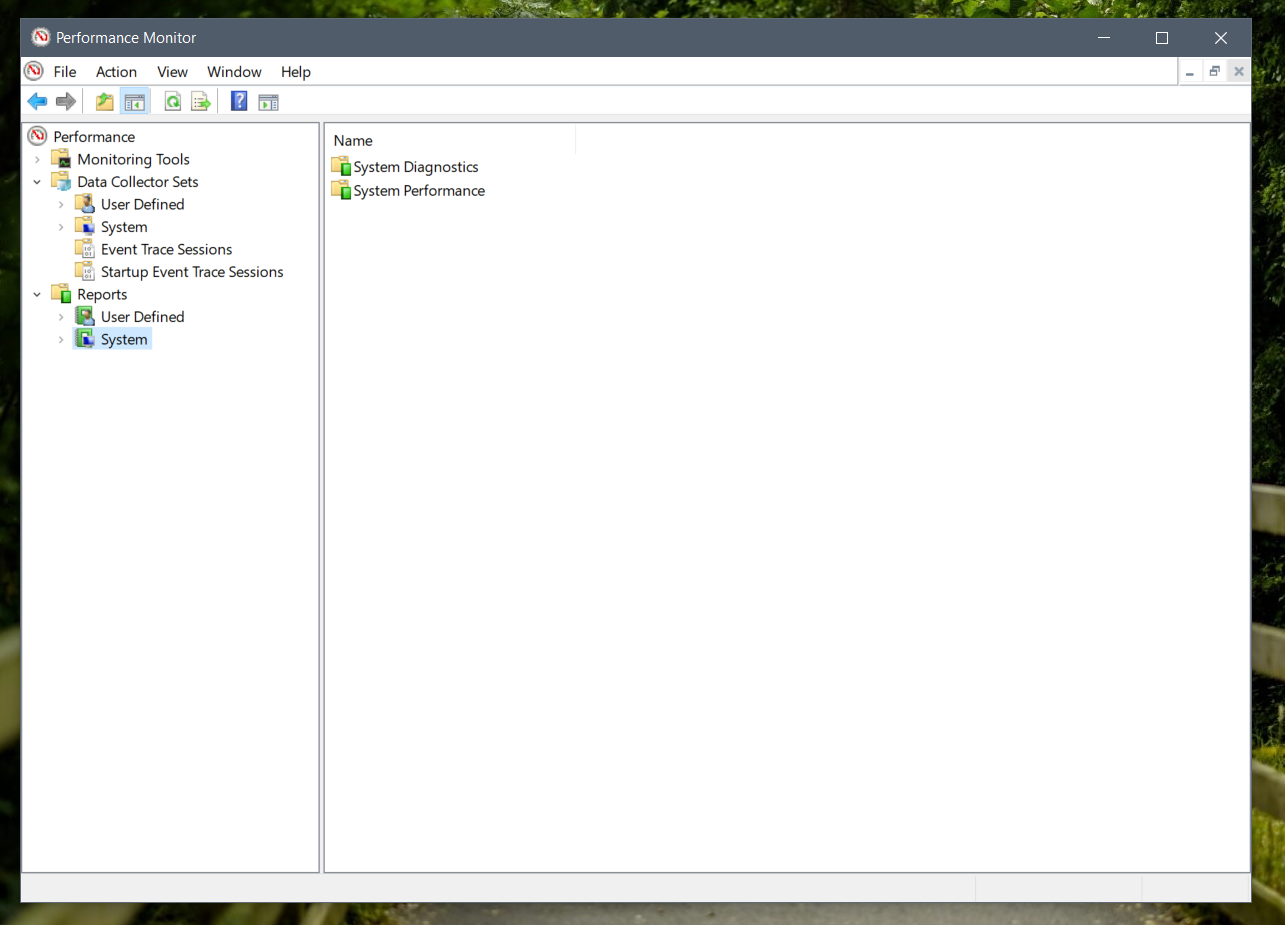
- Click on the right arrow icon of the “System Diagnostics” section bar again to view its sub-items.
- In the opened section, click on the attached diagnostic report, which is named with the computer code name, and wait for the system to complete the diagnostics.
- In the right pane of the Performance Monitor application window you will see the full and detailed report generated by the system.
- 9.1. In it, find and open the “Warning” section, where in the “Basic System Checks” table, click the button with the “+” icon next to the “Disc Checks” item in the “Tests” column.
- 9.2. In the table column, find the row “SMART check – failure prediction”.
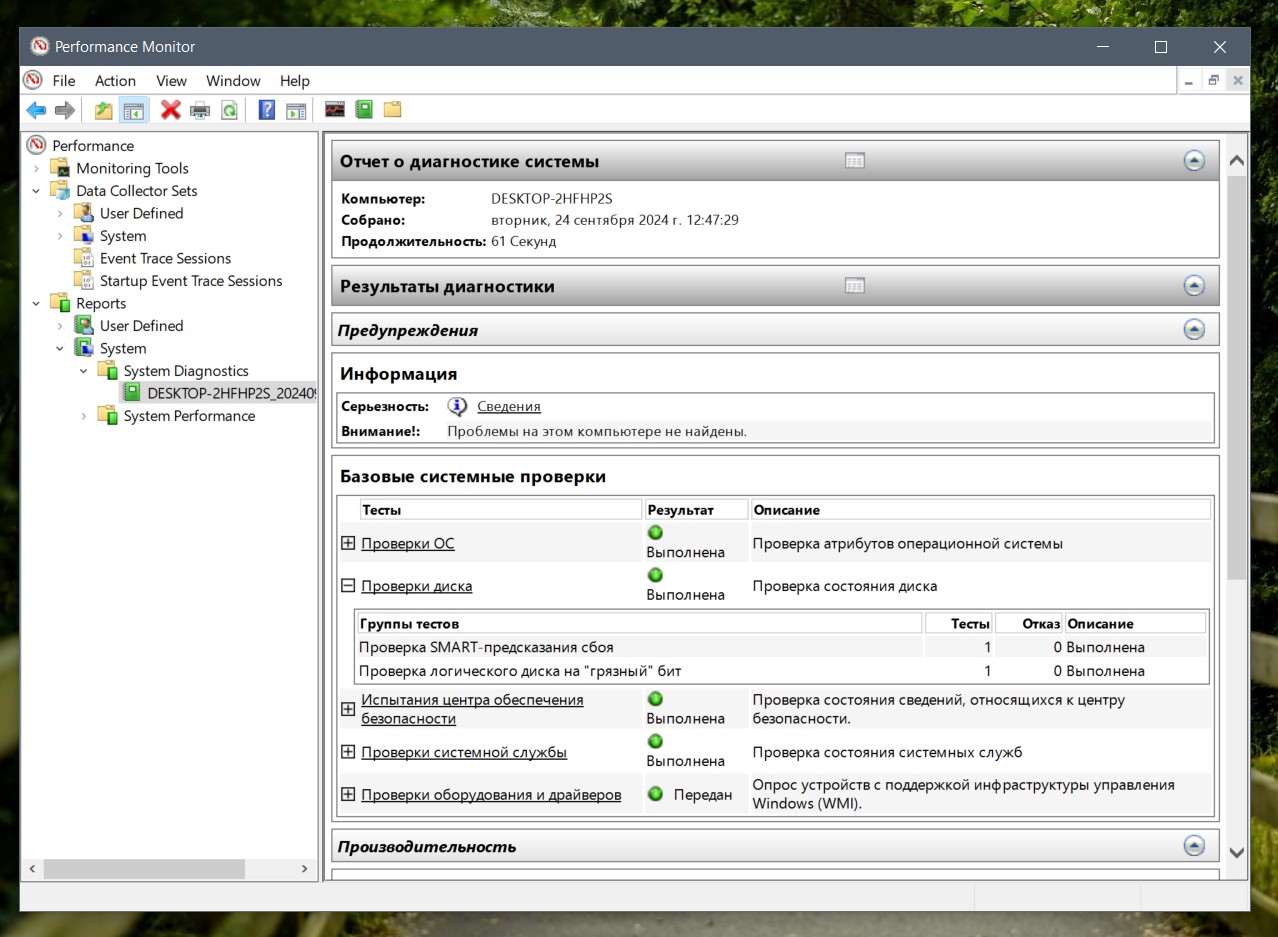
If the “Failure” column of the line being checked displays a numeric value of zero and the next “Description” column is set to “Executed”, it means that the HDD is operating without problems.
Error codes and names may differ depending on the HDD, motherboard or OS version. However, any of them is a signal to back up your files.
If “SMART” reports a failure and you can still access the problem drive, it is better to back up your drive data immediately to minimise its possible loss. You can do this by copying and transferring your files to another serviceable drive or by using the built-in backup tool available by default in Windows 10.
Other methods of hard disk drive software diagnostics
For many years now, HDDs have been provided with a self-diagnostic system that can tell the user how close the drive is to failure. Consider checking the SMART of a hard disk drive by using the following specialised programs, which provide information about the device's status in a maximum of three clicks.
AIDA64 programme
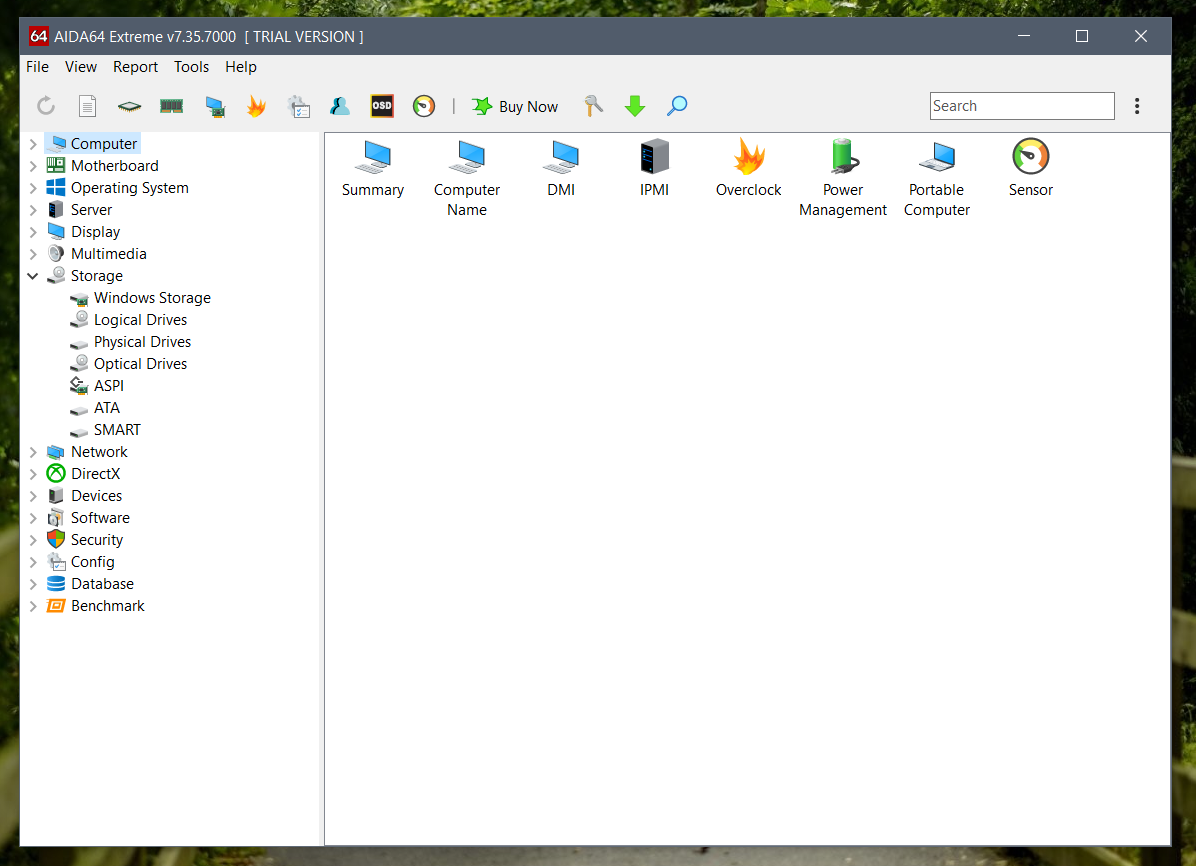
AIDA64 is suitable for diagnosing not only HDDs but also SSDs.
- Download the AIDA64 programme.
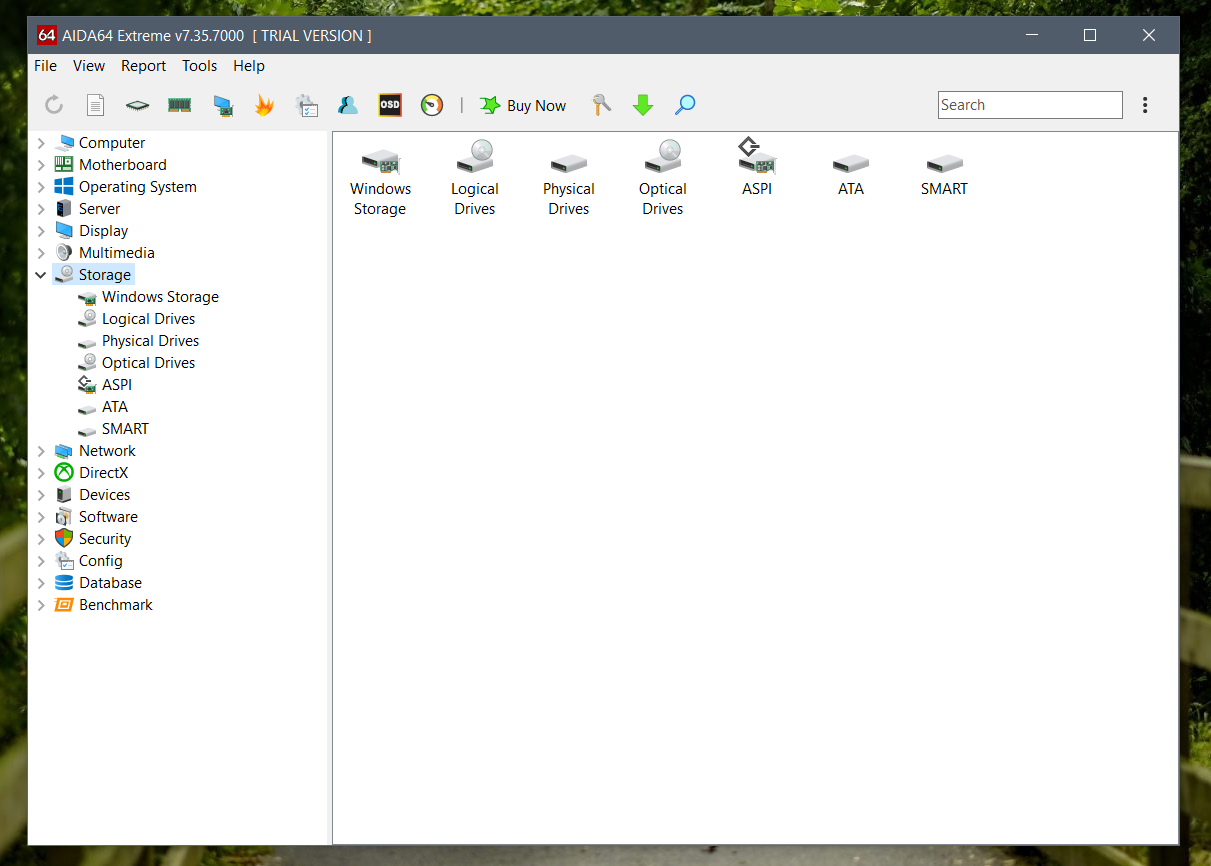
- Open the “Data Storage” tab by clicking the corresponding icon or line.
- Go to the “SMART” section.
- Review the SMART data.
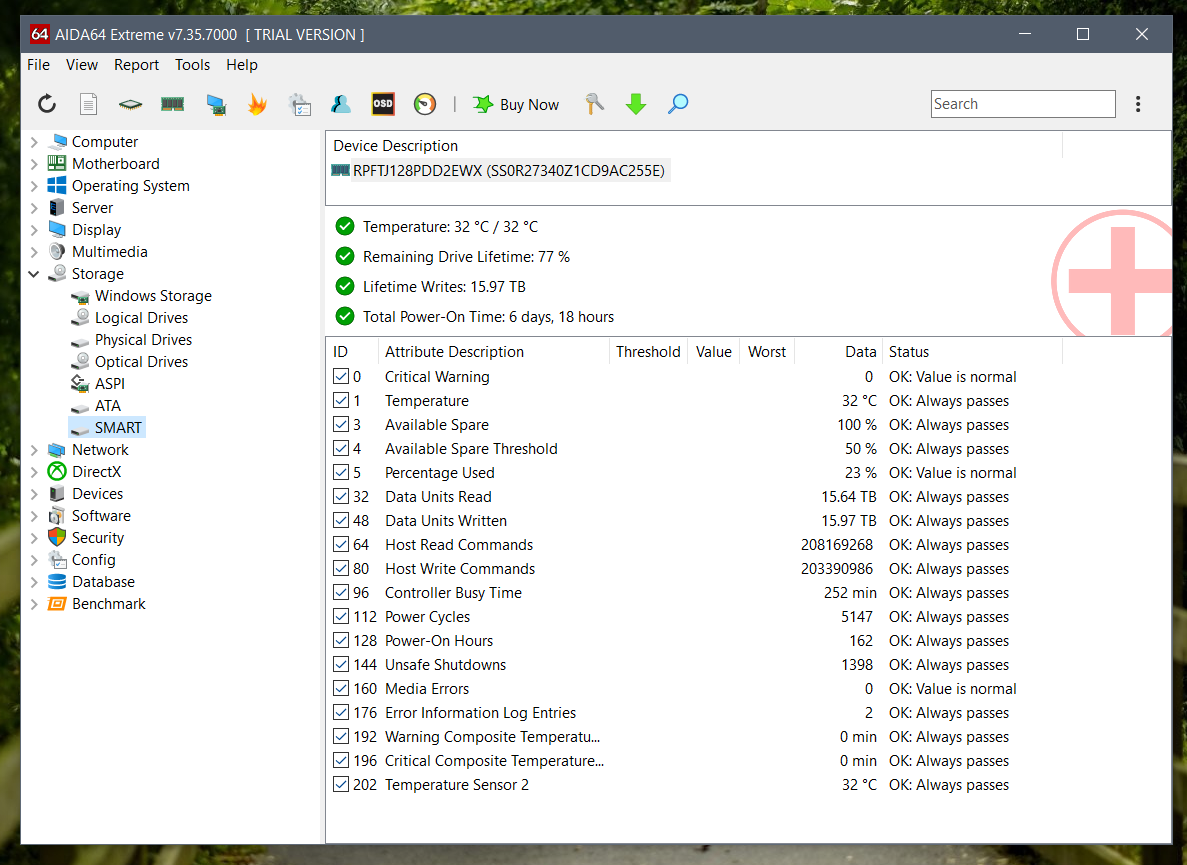
The first attributes to be displayed in the report are “Temperature”, “Remaining Drive Lifetime”, “Lifetime Writes”, and “Total Power-On Time”. The evaluation of all attributes, whose names are presented in English, can be seen in the “Status” column, where the “Value” corresponding to the quality of work is displayed.
If the temperature is too high, you should take measures to cool down the system unit:
- Check the performance of the colours.
- Clean the unit from dust.
- Install an additional cooler for better ventilation.
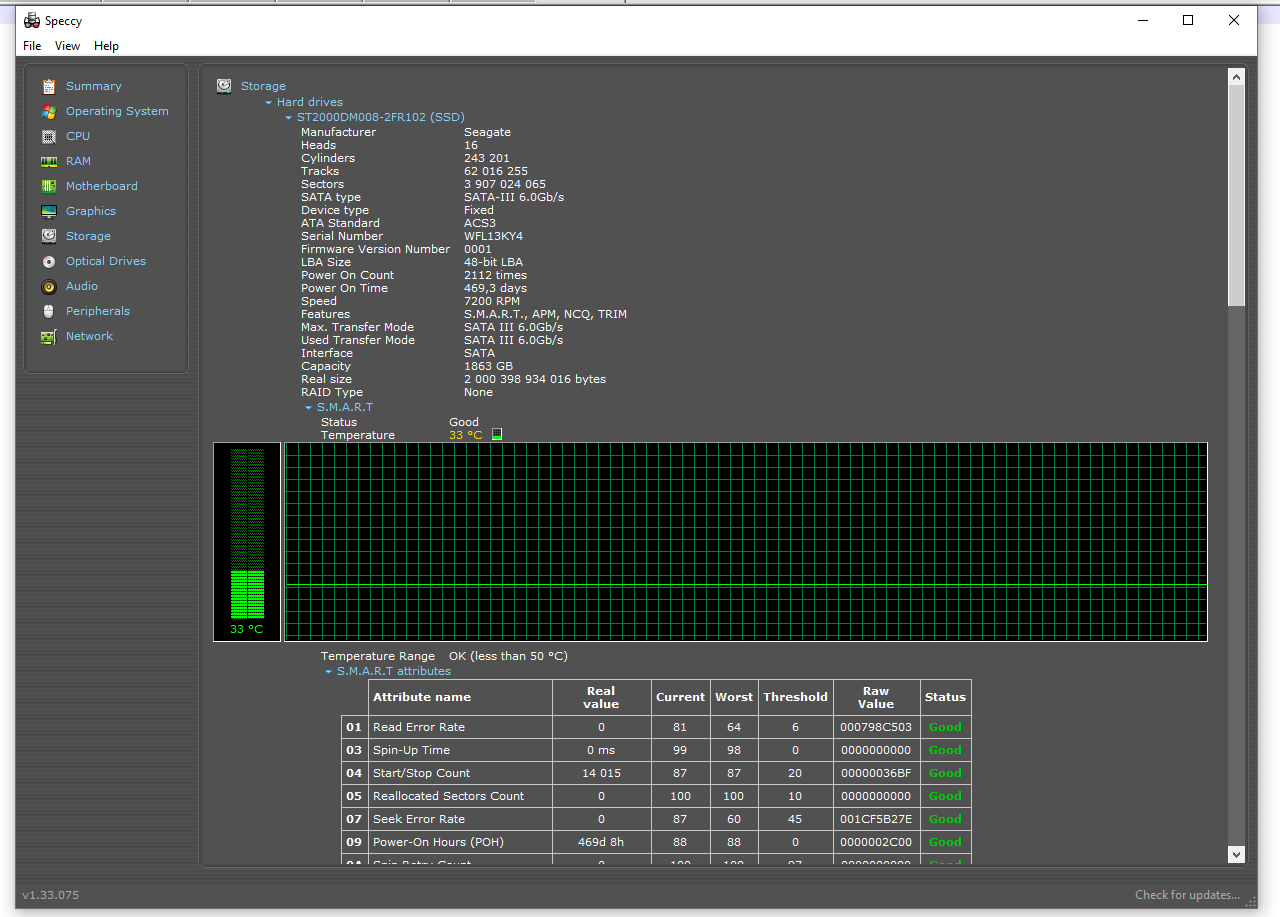
Speccy programme
Speccy also gives you the opportunity to freely evaluate the main indicators of HDD by SMART system.
- Download the Speccy programme.
- Click with the left mouse button on “Storage”.
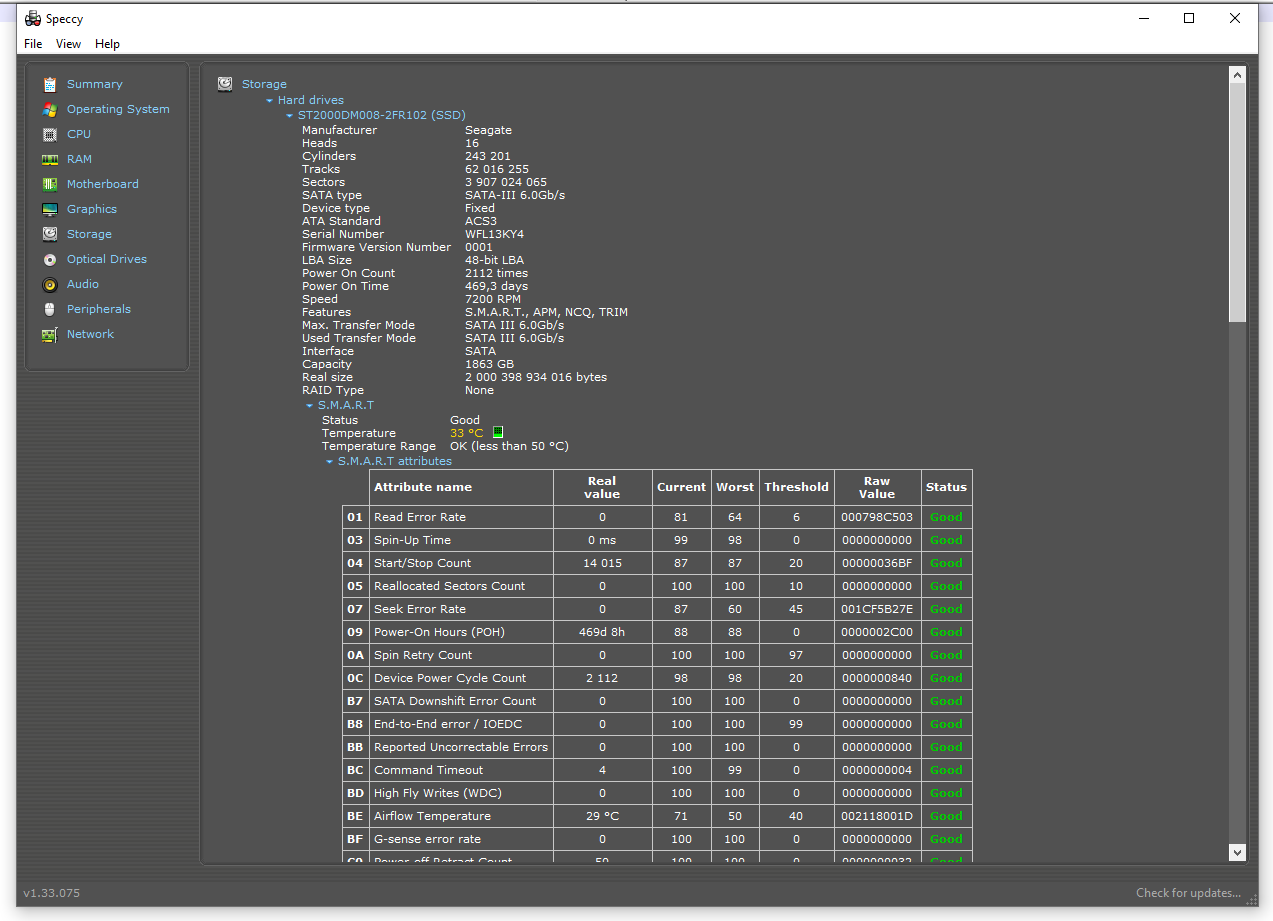
- Review system data and “S. M. A. R. T. attributes” by different parameters.

- To view the temperature graph, click on the label next to the temperature indicator.
CrystalDiskInfo programme
Another specialised program that allows you to quickly see SMART details and find out basic information about your devices. All you have to do is download and open it.
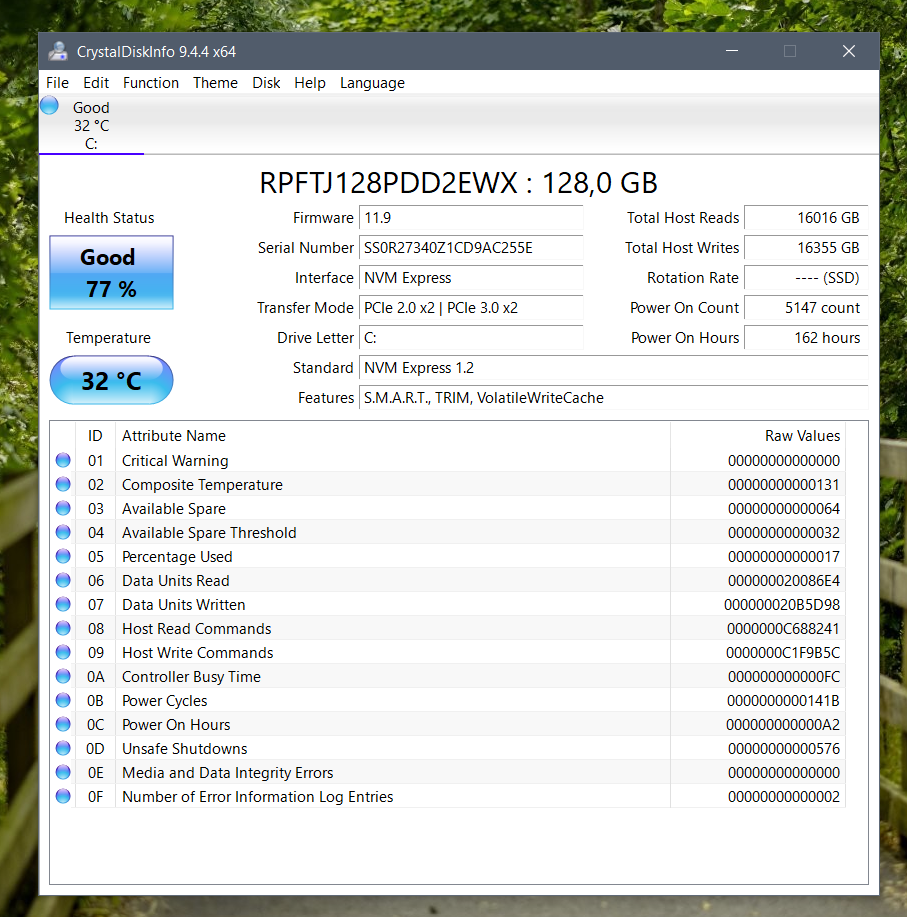
The main report window will display data such as “Health Status”, “Temperature” and a list of attributes. However, Speccy does not provide output for each attribute. You can evaluate them separately by manually checking the “current” and “threshold” columns or by searching the web for the designation of a specific “Raw value”..
HDDScan programme
This free software is also suitable for quickly checking hard drives by evaluating SMART parameters.
- Download the HDDScan programme.
- Unzip the archive. Open the programme and select the “SMART” option.
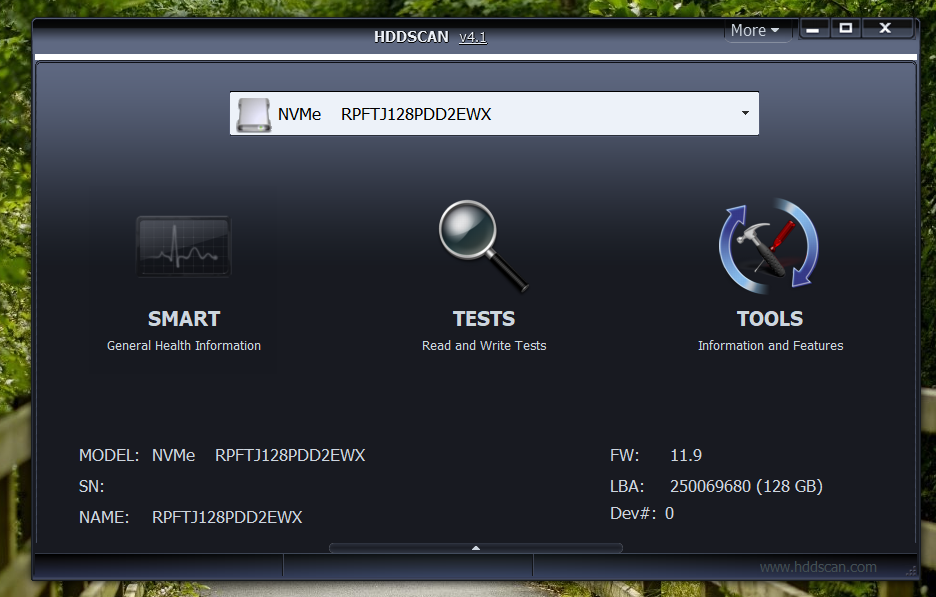
- As a result, you will get a ready-to-save report in HTML or txt format.
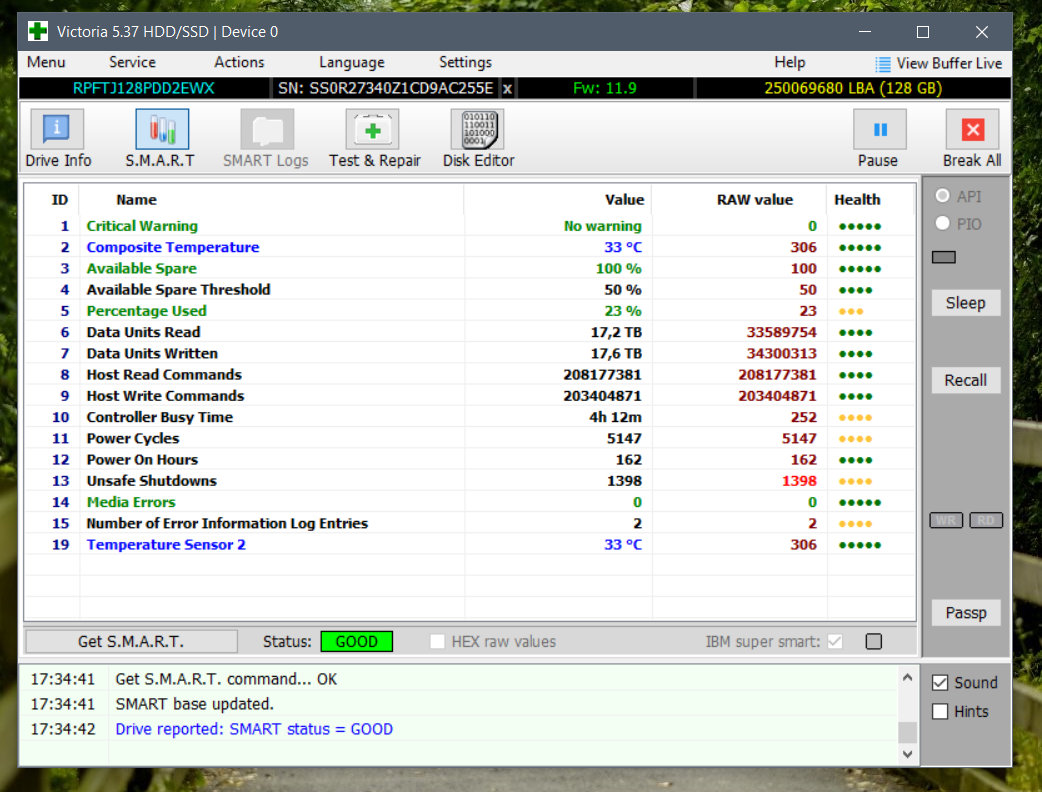
Victoria programme
This multifunctional program works with different types of discs. Victoria differs from other programs in that it evaluates each individual parameter on a five-point colour scale.
- Download the Victoria programme.
- Click on the “S.M.A.R.T.” icon.
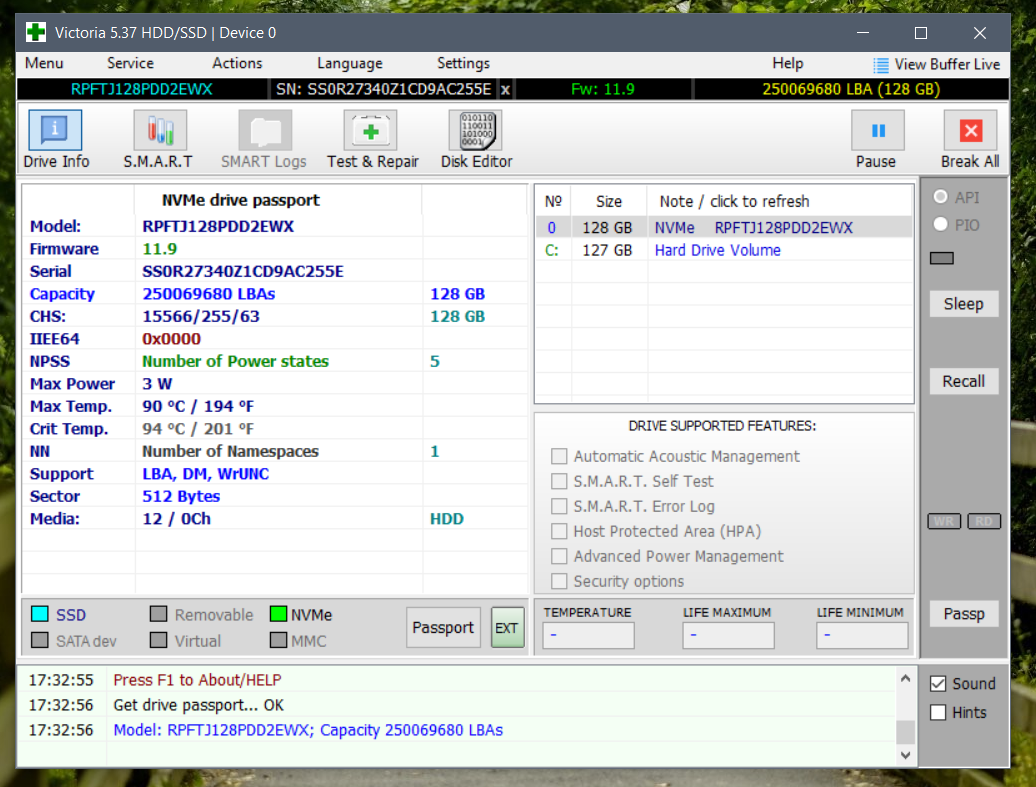
- As a result, you will get the test data of the selected HDD.
It is recommended that you check your hard drives regularly, especially if there are specific signs of hardware malfunction. The methods described above will allow you to save your important information, even if you are a novice user.
More comments


Максим
27.12.2024
1
0
Reply
Макснет
30.01.2025
0
0
Reply
DM
30.09.2024
0
0
Reply