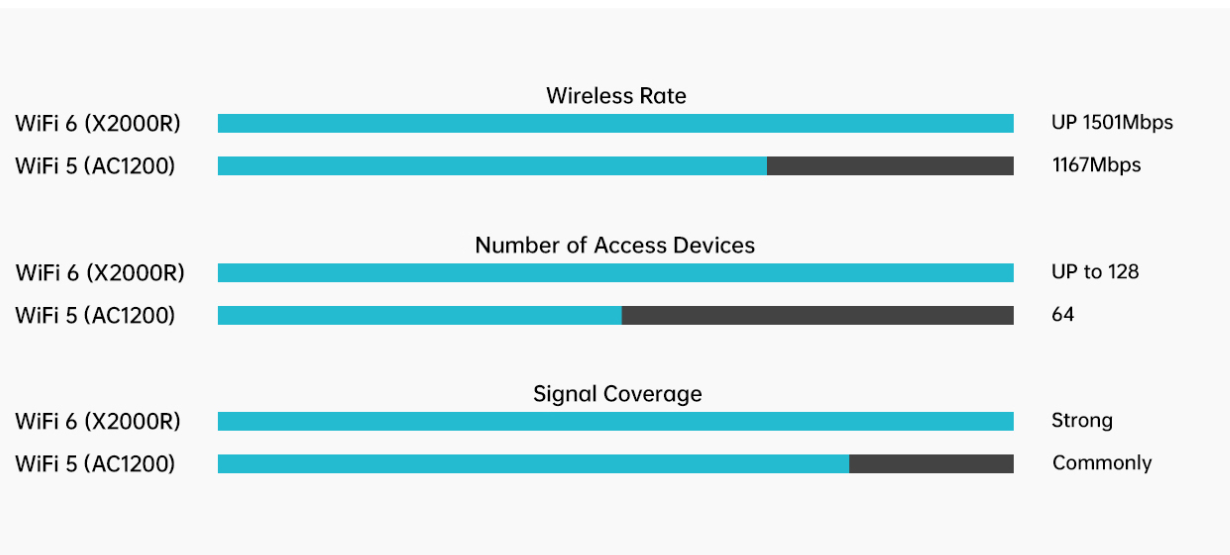
Wi-Fi 6 (IEEE802.11ax) provides a huge boost in speed and overall capacity and takes your Wi-Fi to the next level. And it is backwards compatible with IEEE802.11a/b/g/n/ac Wi-Fi standards.
The latest Wi-Fi 6 wireless technology is suitable for faster speeds, higher capacity and reduced network congestion.
Supports the more robust WPA3 wireless security protocols for network security.
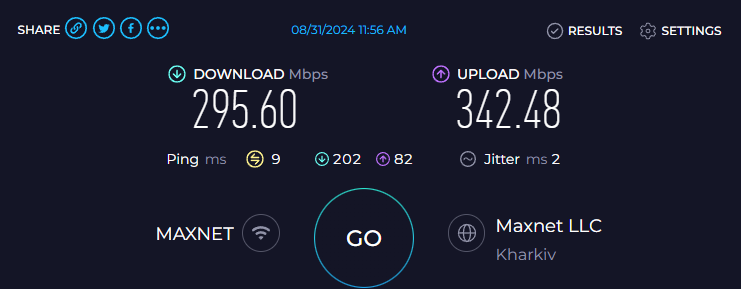
Speedtest results at 5 GHz are as follows:
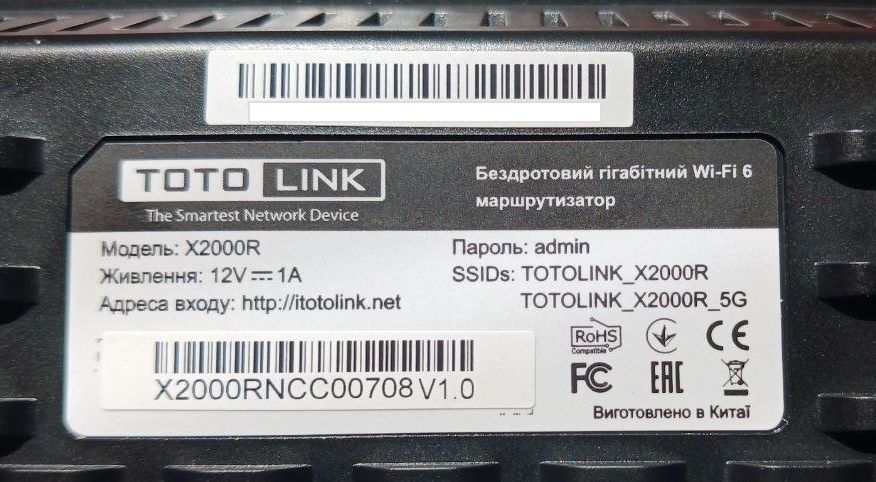
Information on the back of the router that you may need when you first start up and configure the router:
To access the router's web interface, enter one of the following addresses into the browser address bar: http://192.168.0.1/ or http://itotolink.net/.
The default login password is admin. It is desirable to change it immediately, so as not to simplify the task of hacking the device.
Easy Setup
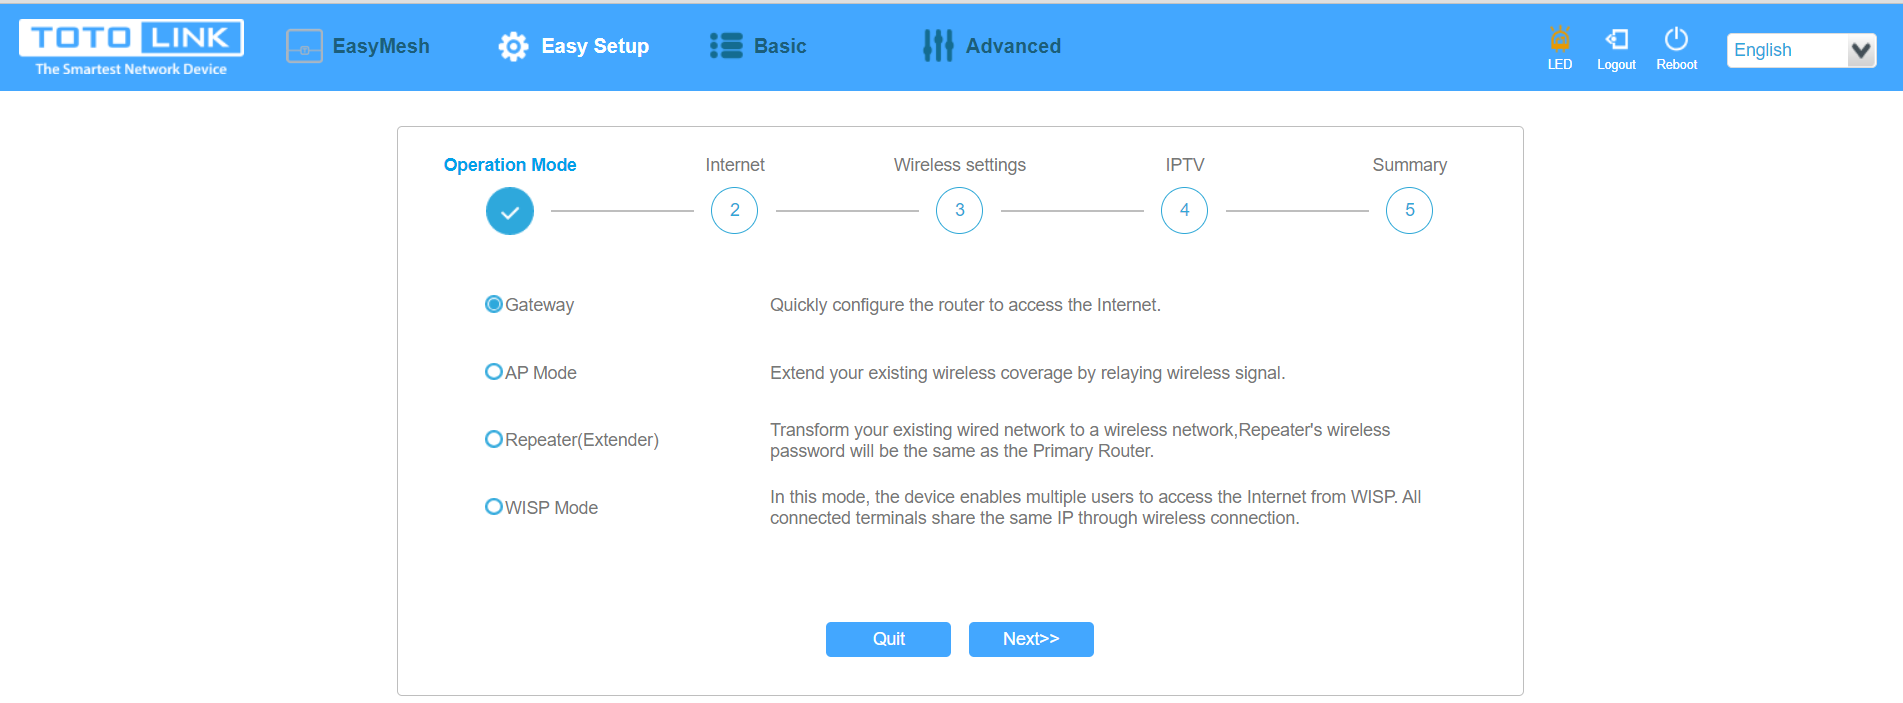
Easy setup consists of 5 steps:
- Operating Mode — select router mode.
- Internet — select DHCP.
- Wireless settings — enable the required 2.4 GHz and 5 GHz networks, set encryption, make up a name and password for each. You can connect two networks into one.
- IPTV — disabled.
- Summary — check all the data you entered earlier and press “Finish”.
Wait until the settings are applied and then you can connect. This is the end of the easy setup.
Basic Setup
The Basic Setup menu of the router consists of the following functions: Home, WAN Settings, Wireless Internet, Parent Controls, QoS, Guest Network. Let's take a closer look at each of them.
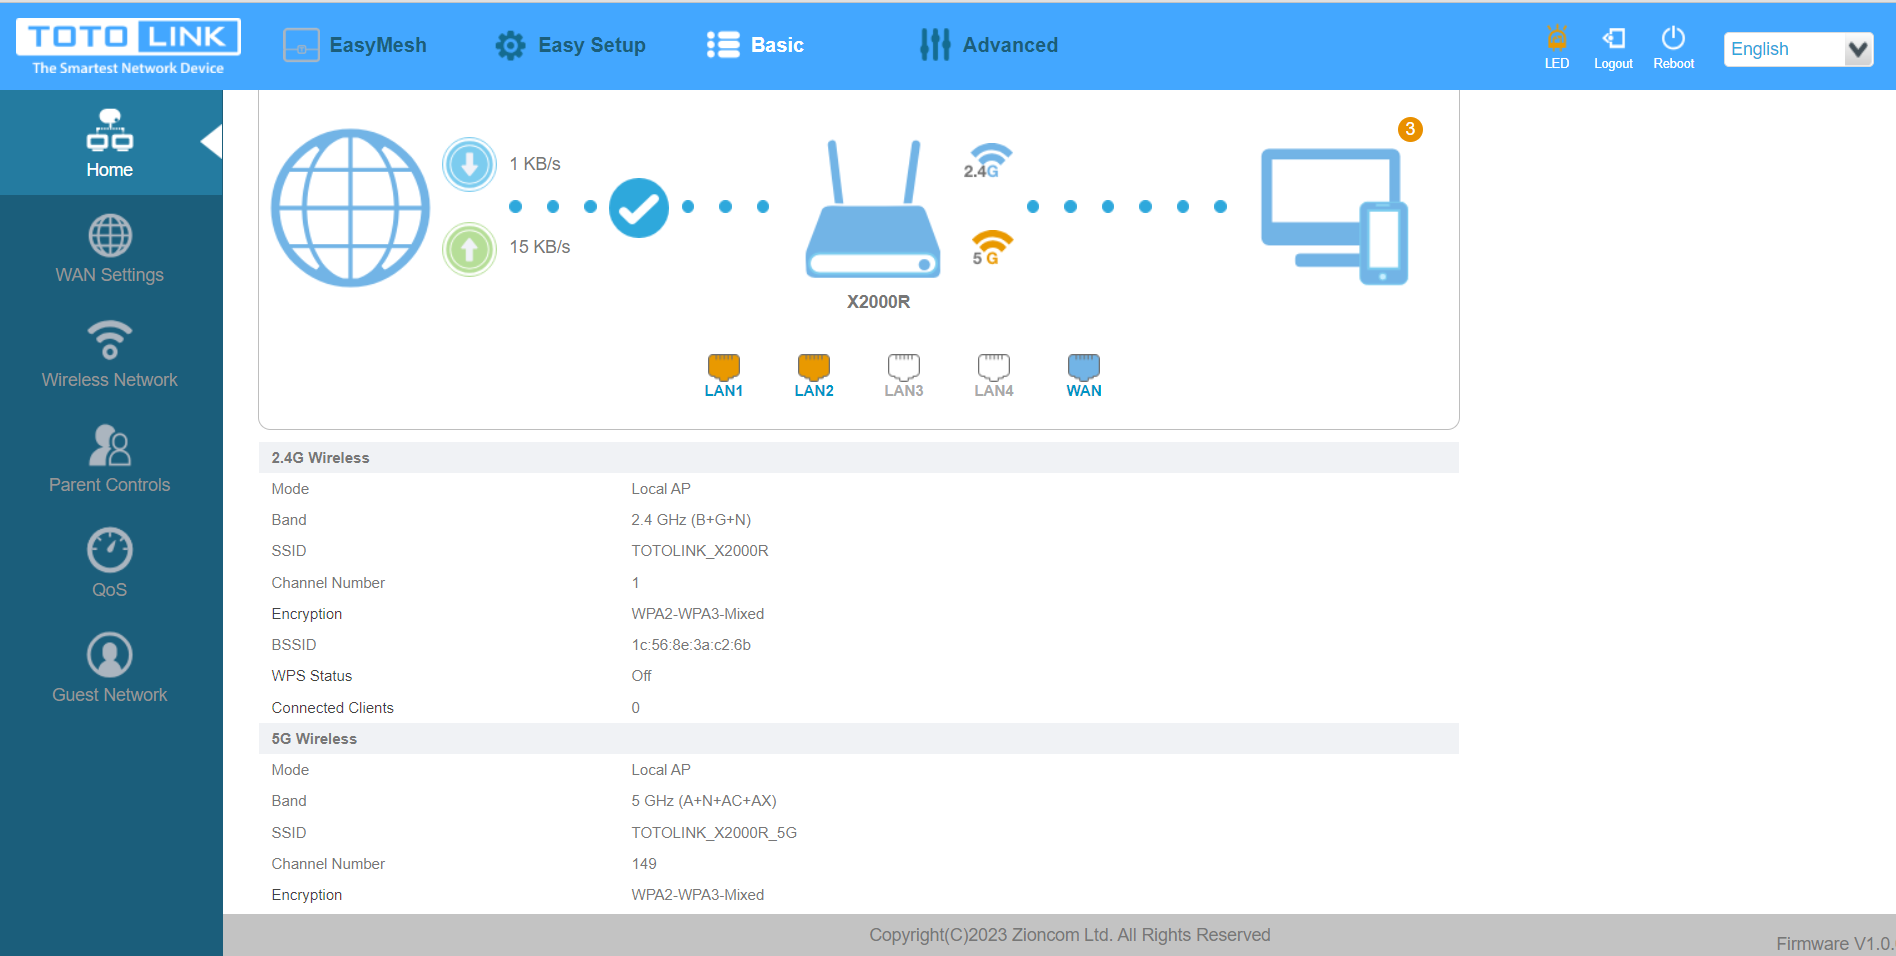
Home. This is the main menu for router diagnostics. Here you can see whether the router is connected to the network or not, in what mode it works, what IP-address it has received. If you click on the globe icon, just below you can see the network parameters that the device receives or does not receive in case of incorrect configuration.
By clicking on the router icon, you will see the Wi-Fi network settings, their name, what channel they work on, the type of encryption.
Clicking on the monitor icon will open the list of connected equipment (PCs, phones, tablets). You can check the device name, MAC address, IP address and the way the router is connected (via cable or Wi-Fi).
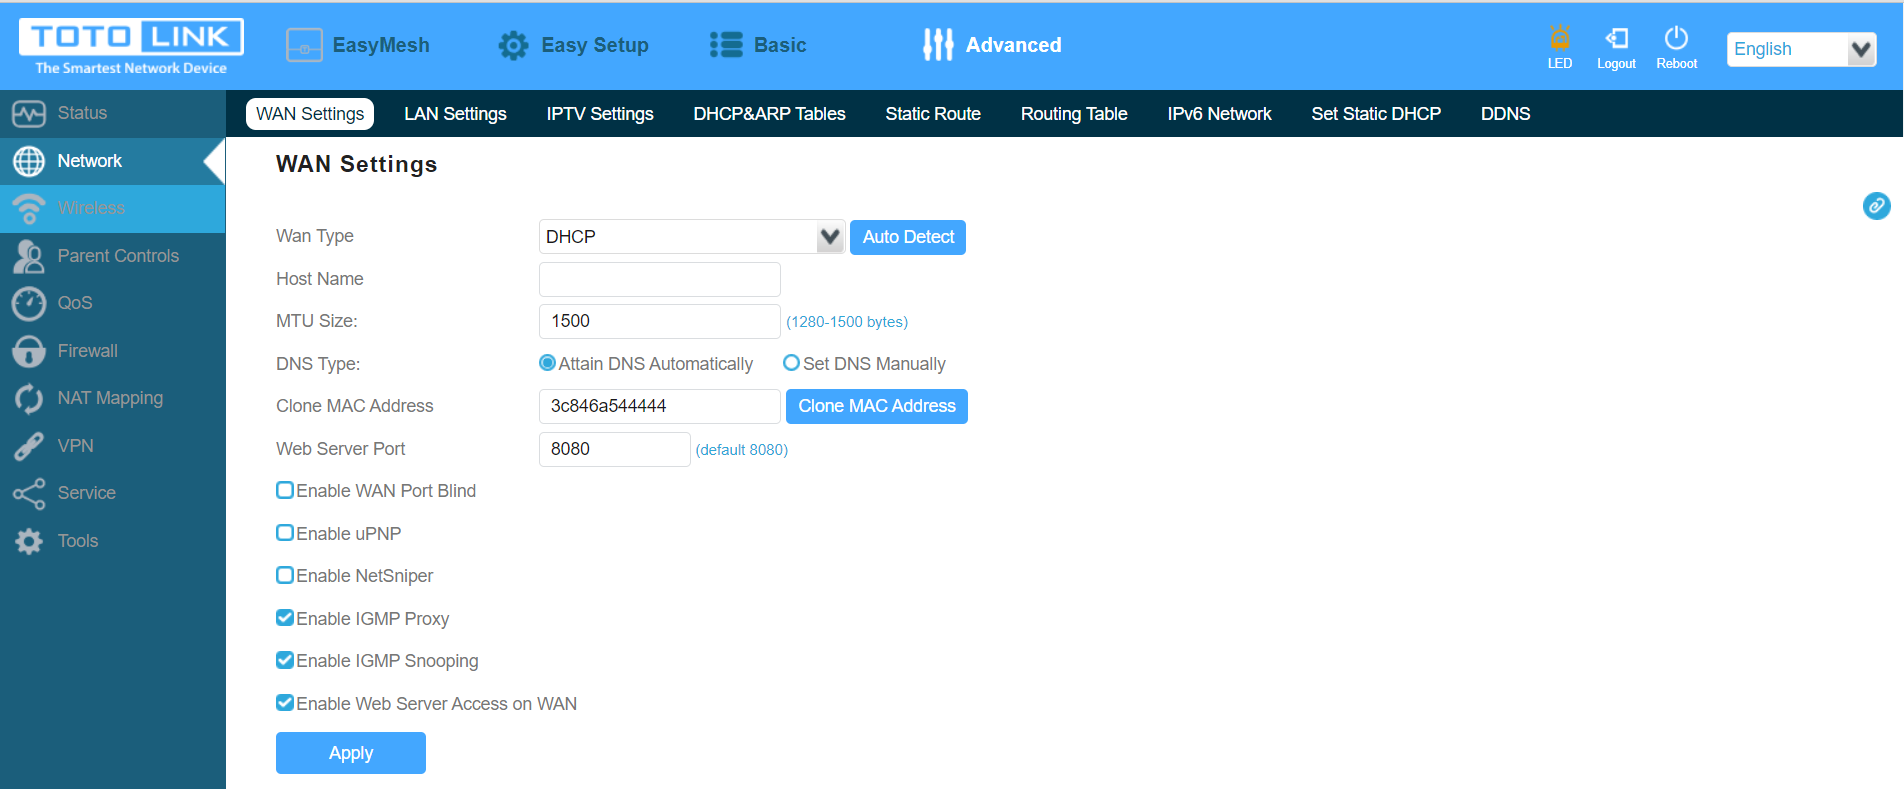
WAN Settings. Here you can specify the type of connection (in our case it is DHCP or Automatic). When initially setting up the router, it is also necessary to specify the MAC address specified behind your connection. It can be viewed in your personal account, clarified in tech support in online chat on the website or by phone number 0800-31-0800.
Wireless Network. This item is completely duplicated with what is described in the “Easy Setup” section.
Parent Controls. This feature allows you to add a device to which you can later apply restrictions on logging in to individual site addresses and hours of operation by day of the week and by hour.
The restriction mode can be configured in two ways:
- Blacklist. Provides the ability to block access to certain websites from the router. To do this, add the addresses of the websites you want to block for all devices connected to the network. This method is effective in preventing access to malicious or unwanted resources.
- Whitelist. Gives permission to access only certain websites, restricting access to the rest. You specify the addresses of sites that users can visit, and all other sites will be automatically blocked. This approach is useful when you want to ensure access only to certain educational or secure resources.
QoS. This feature gives you the ability to create upload and download rules for each connected IP address, and set limits on downloading and sending files.
Guest Network. This function is designed to provide the Internet to guests or temporary users while maintaining the security of the main network. It allows you to create a separate Wi-Fi network with limited access to Internal resources on the main network, such as computers, printers, and other devices. The guest network is usually accessed using a simpler password that can be easily changed after the guests leave.
Additional settings
Ping on the WAN port
Ping is often helpful for remote diagnostics. You can enable it by going to “Advanced” — “NAT Mapping” — “VPN pass through” — “Ping Access on WAN”.
Enable WAN Port Blind
Note that Enable WAN Port Blind must be disabled. Otherwise, all MAC addresses of connected devices will be displayed on the port, and it will make it difficult to obtain an IP address and configure the router.
You can check this by going to the corresponding menu: “Advanced” — “Wireless” — “WAN Settings”.
Router Firmware
You can check the firmware version of your router by going to “Advanced” — “Tools” — “Update Firmware”. Right now there:
Firmware Version TOTOLINK-X2000R-Gh-V1.0.0-B20230726.1108.
This is the latest version for today. You can check for new versions by clicking on the following link.
Setting up remote access to the router
Remote access to the router allows you to manage and configure the device from anywhere outside the local network. It is convenient for monitoring network operation, changing settings, troubleshooting, updating firmware and other tasks that do not require physical presence near the router.
You can enable remote access as follows: go to “Advanced” — “Network” — “WAN Settings” — tick the box next to the line “Enable Web Server Access on WAN”. It is also desirable to change the port from the standard 8080 to any available port. Once configured, you can log into the router's web interface via the Internet by entering the white IP and the port you specified in the browser in the format https://[WAN IP]:8585.
Changing the password in the router web interface
Changing your router's web interface password is necessary to keep your network secure. By default, many routers have default passwords that are easy to guess. By changing the password, you protect your router settings from unauthorised access, prevent network hacking and ensure the security of connected devices.
You can change the password as follows: go to “Advanced” — “Tools” — “Password Settings” — enter the current password and confirm the new password twice.
Routers with support for Wi-Fi 6 and WPA3 encryption are great for those who are interested in maximising the performance and security of their network. Such models are especially relevant for users who are interested in Internet speed and data protection.
A video review of the key parameters of the Totolink X2000R router from the Maxnet team is available on our YouTube channel:
Еще комментарии





Роман
31.12.2024
0
0
Reply