
Mikrotik RB2011UiAS-2HnD-IN is a multi-port Wi-Fi router that allows you to organize a high-performance network of any complexity in rooms.
Initial setting
When you turn it on for the first time, connect the cable from the provider to the first Internet port, and the cable from the PC or laptop to any other.
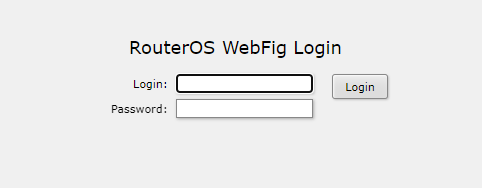
Enter 192.168.88.1 in the address bar of the browser.
The default login is “admin”, without a password.
To quickly set up Internet access, select “Quick Set” at the top right.
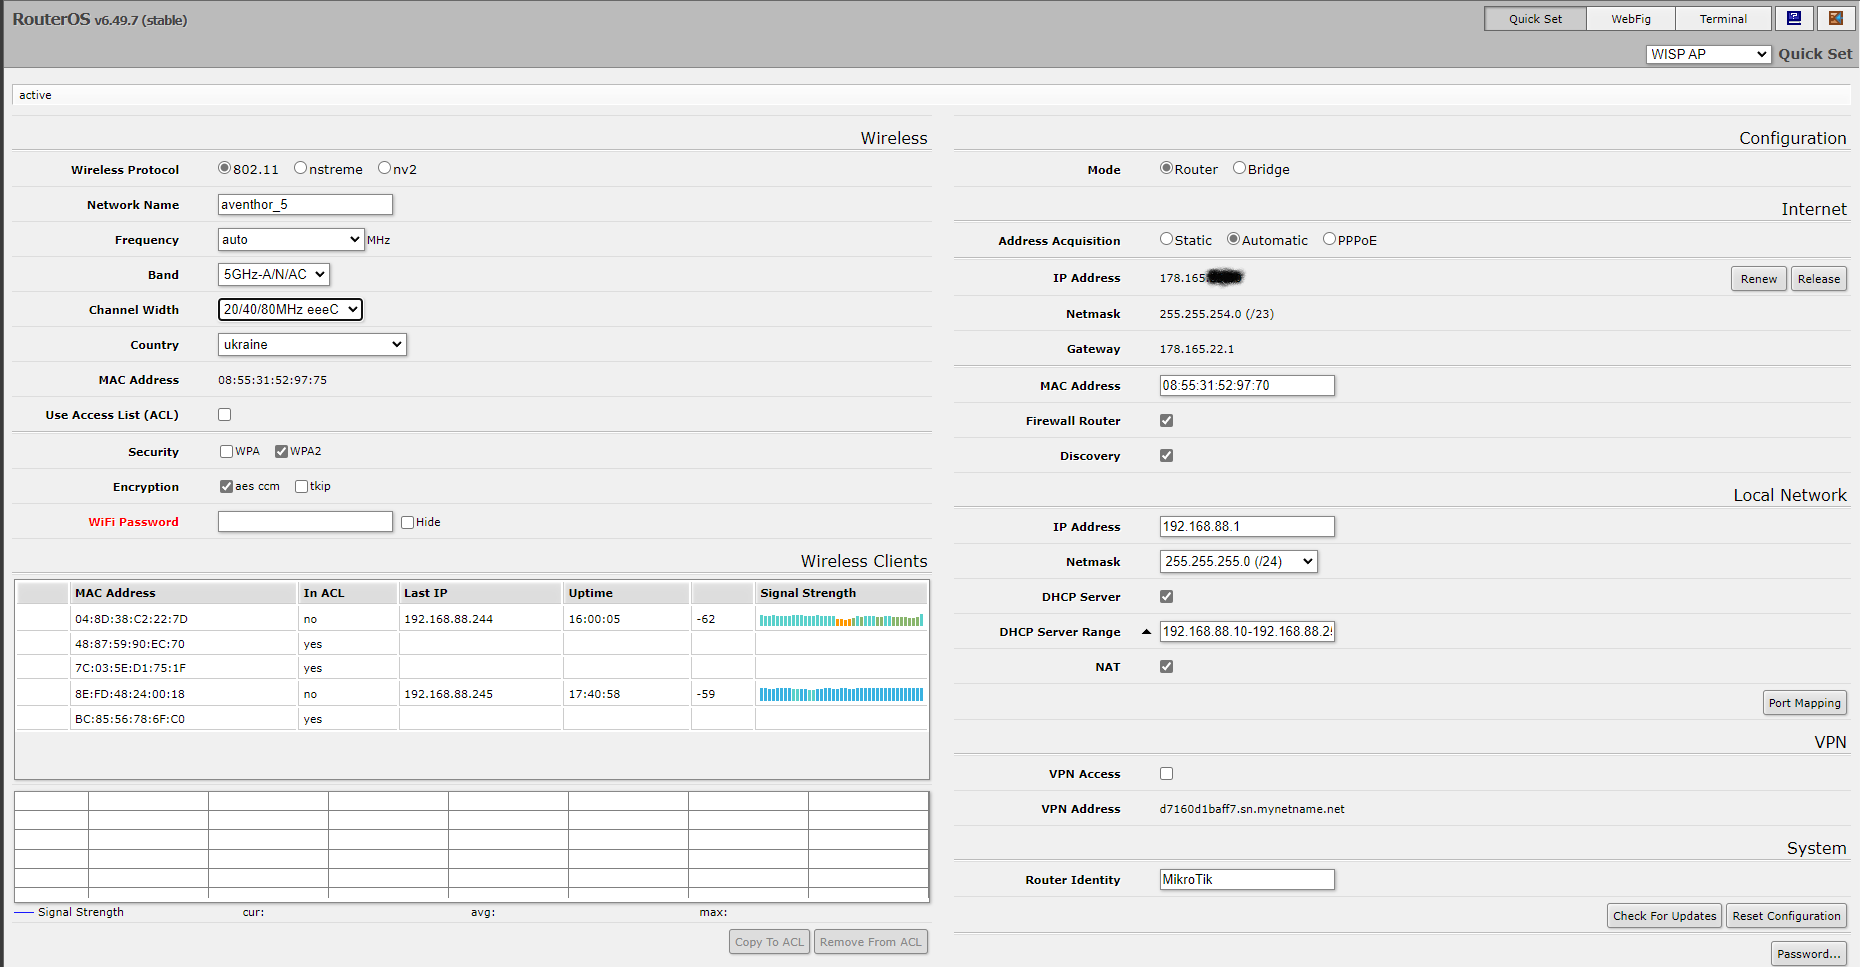
In the left column:
- Wireless Protocol - 802.11.
- Network Name is the SSID or Wi-Fi network name.
- Band - Wi-Fi network protocol - select 5GHZ-A/N/AC, if the router is single-band, then there will be only 2GHZ, then select 2GHZ-B/G/N.
- Country - Ukraine.
- Security - WPA2.
- Encryption AES.
- Wi-Fi Password - write and remember the password for a Wi-Fi network.
In the right column:
- Mode - router.
- Address acquisition - automatic.
- Firewall Router - turn on for the network filter.
- Discovery - enable for further configuration IPv6.
- MАС address - enter the MAC address assigned to your connection (you can see it in your account in the “Services” section).
- Where the Local Network is - we leave it unchanged. Be sure to check that the DHCP Server and NAT checkbox is checked.
In the lower right corner, click “Apply Configuration”. This completes the basic setup, and you should be able to access the Internet.
Detailed setting
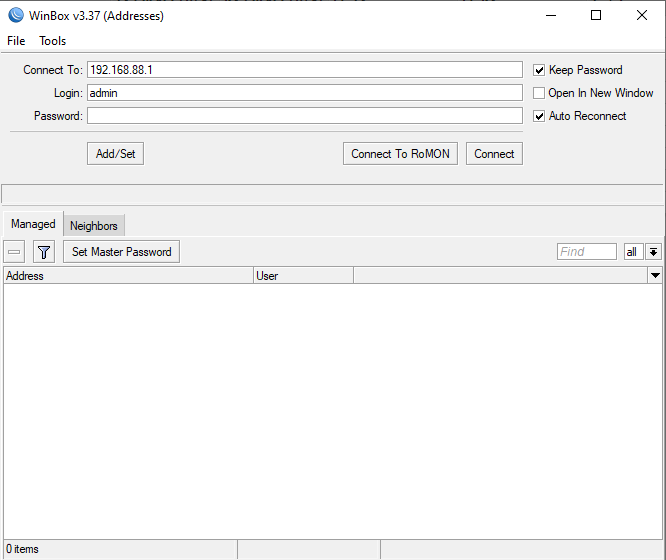
At the top right, go to the “WebFig” section and download Winbox in the appropriate section if you are using Windows OS.
Run the downloaded file and connect to our router by clicking the “Connect” button.
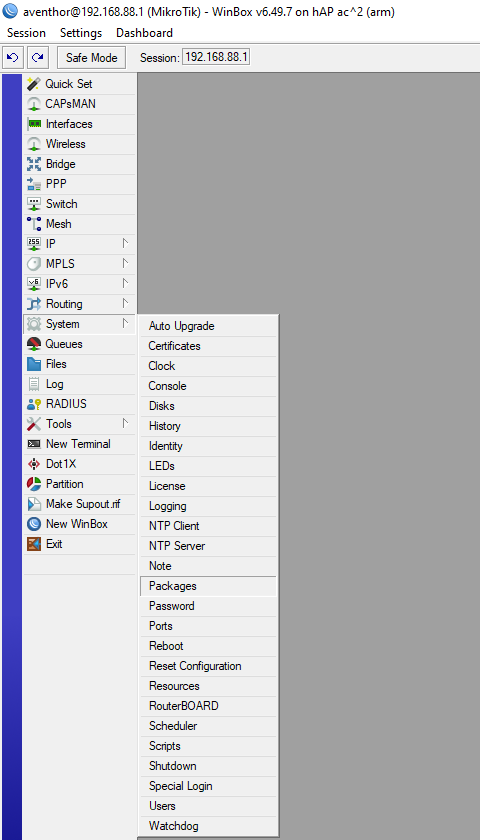
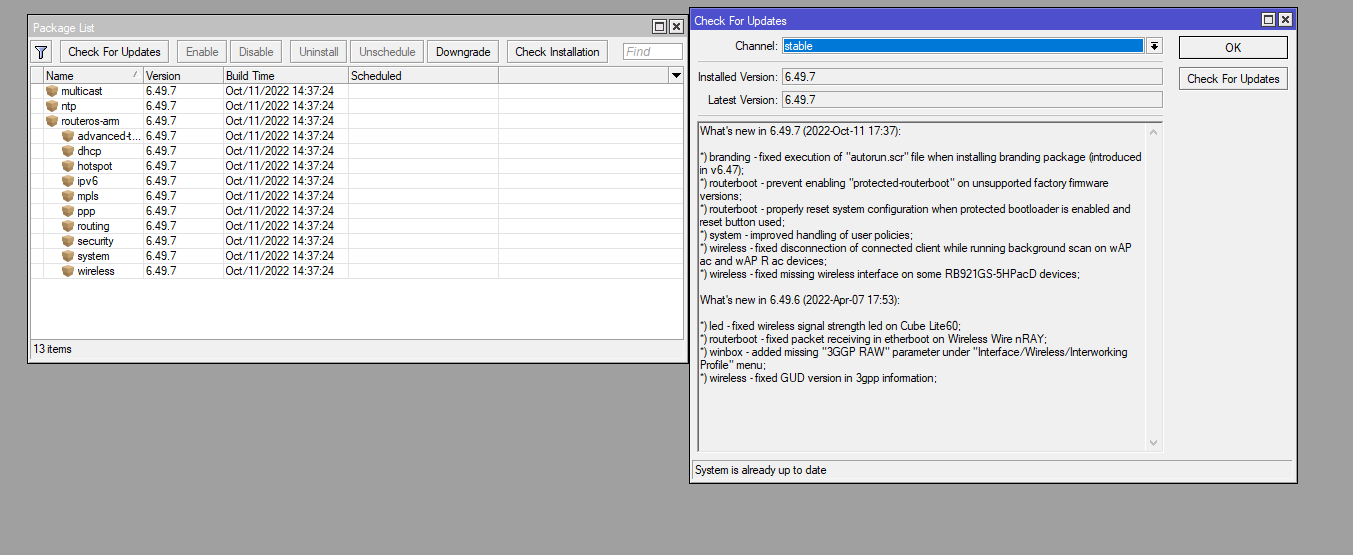
Next, go to “System-Packages” and click “Check for Upgrades” to check for updates. If updates are available, click the “Download & Install” button.
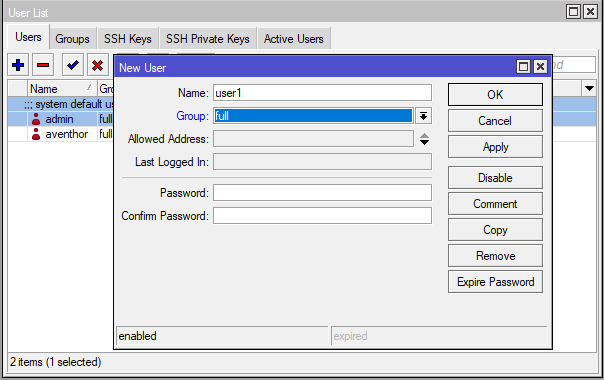
Next, go to “System-Users”, change the password for admin and create a new user, after which we set a password for it. In the “Allowed Address” line, you can specify a list of addresses from which it is allowed to log into the system.
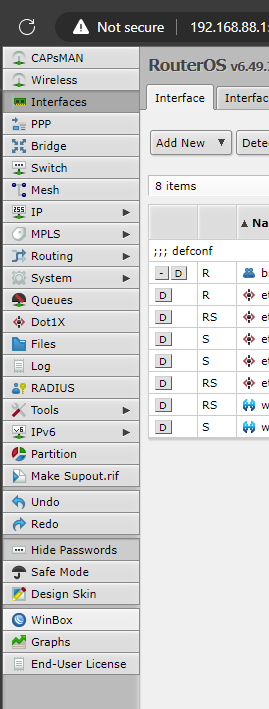
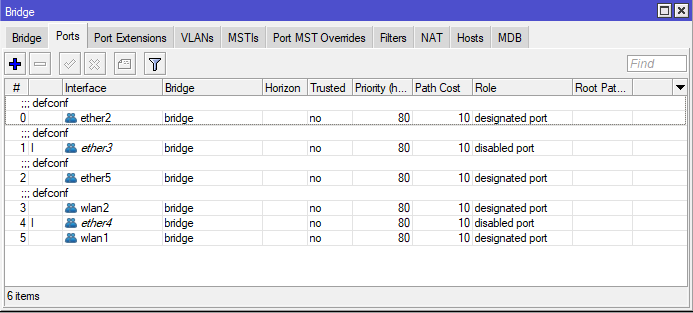
Go to the “Bridge-Ports” section. We make sure that all interfaces, except for ether1, are added to the bridge.
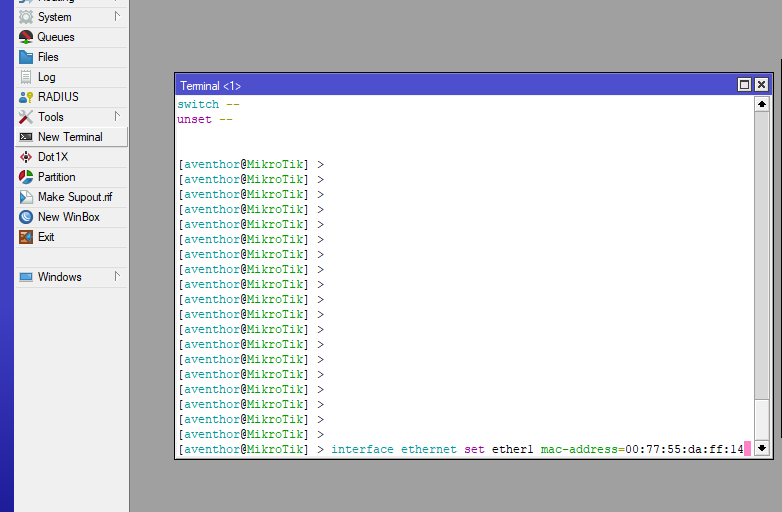
Change the MAC address if necessary. To do this, select “New Terminal” and enter the following command: interface ethernet set ether1 mac-address=xx:xx:xx:xx:xx:xx, where xx:xx:xx:xx:xx:xx is the desired address.
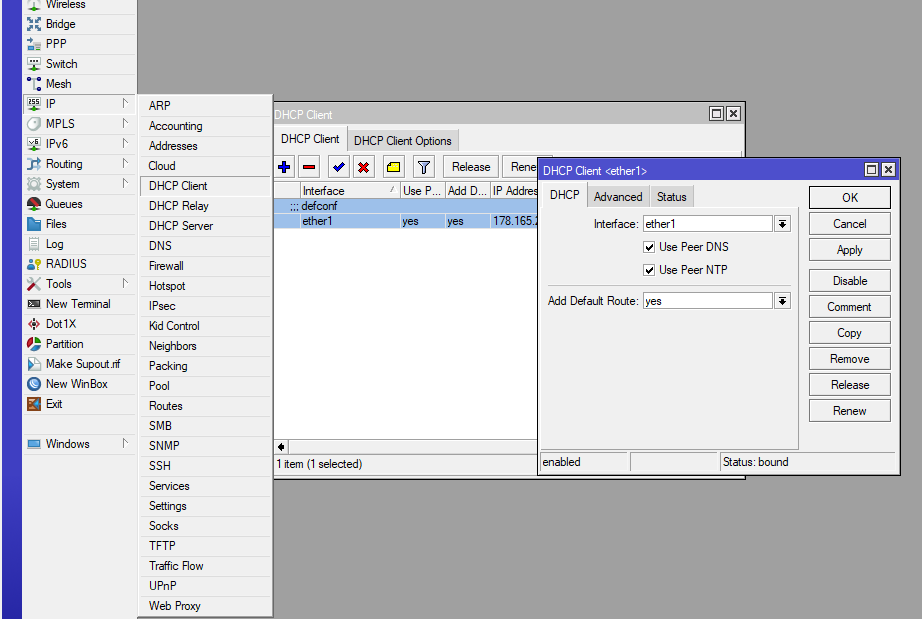
In the “IP - DHCP-Client” section, enable receiving settings via DHCP on the ether1 interface.
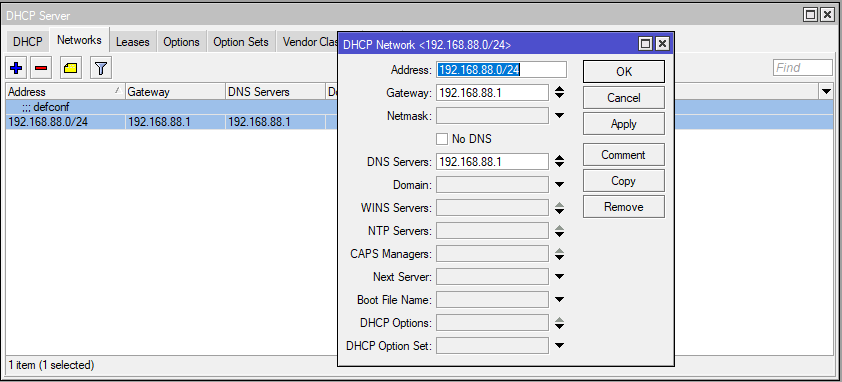
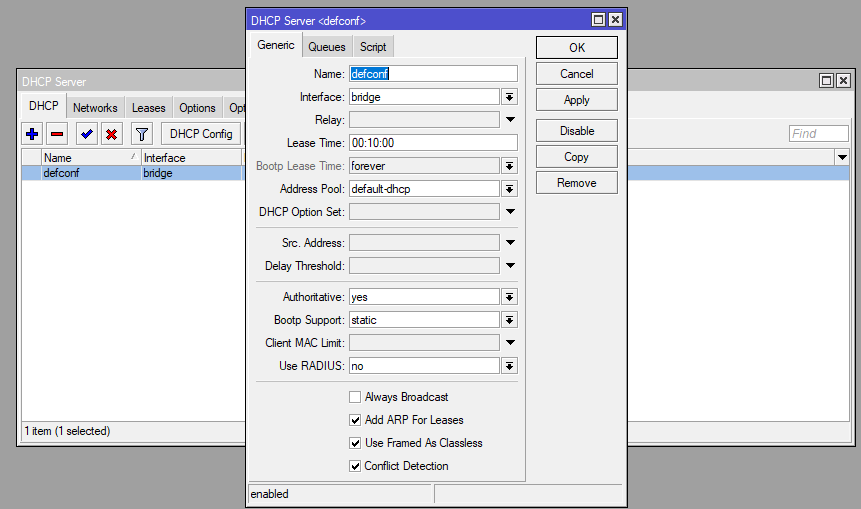
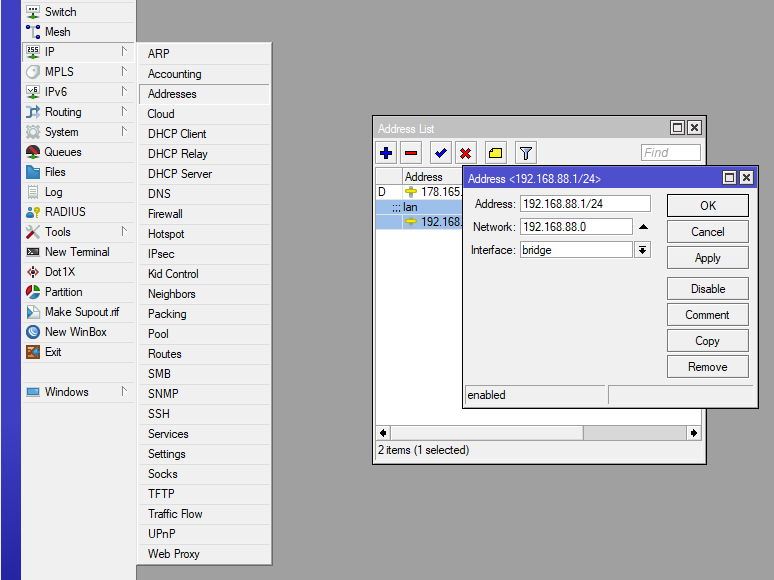
In the “IP - DHCP-Server” section, enable distribution to IP devices on the local network.
We check that we have received an address on ether1 and the correct local IP is set on the bridge.
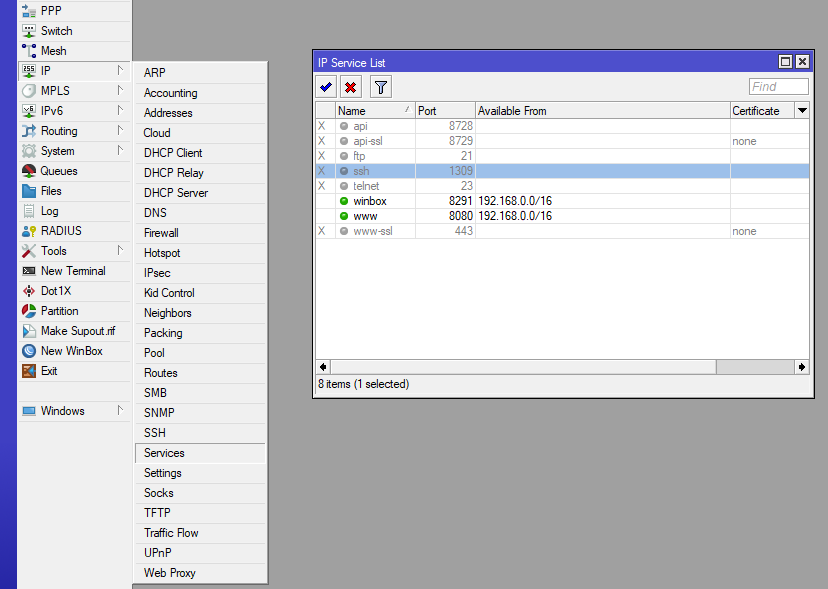
In the “IP - Services” section, turn off unnecessary services:
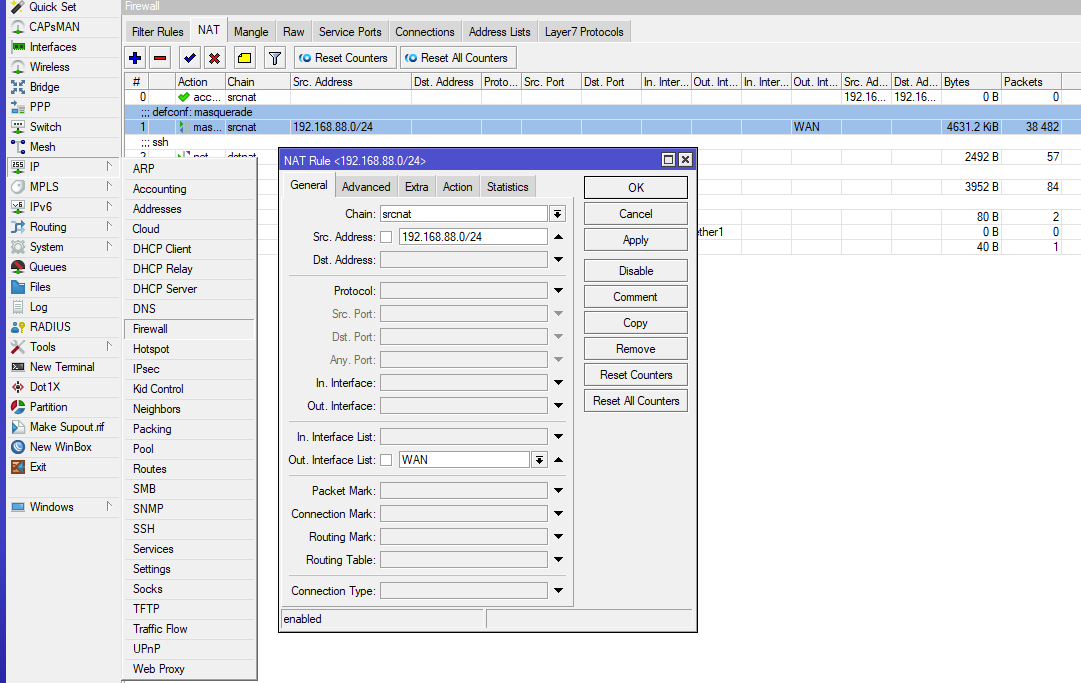
Make sure that NAT is correctly configured to access the Internet from local devices (should be enabled by default). Section “IP - Firewall-NAT” - in the “Action” tab, masquerade must be selected.
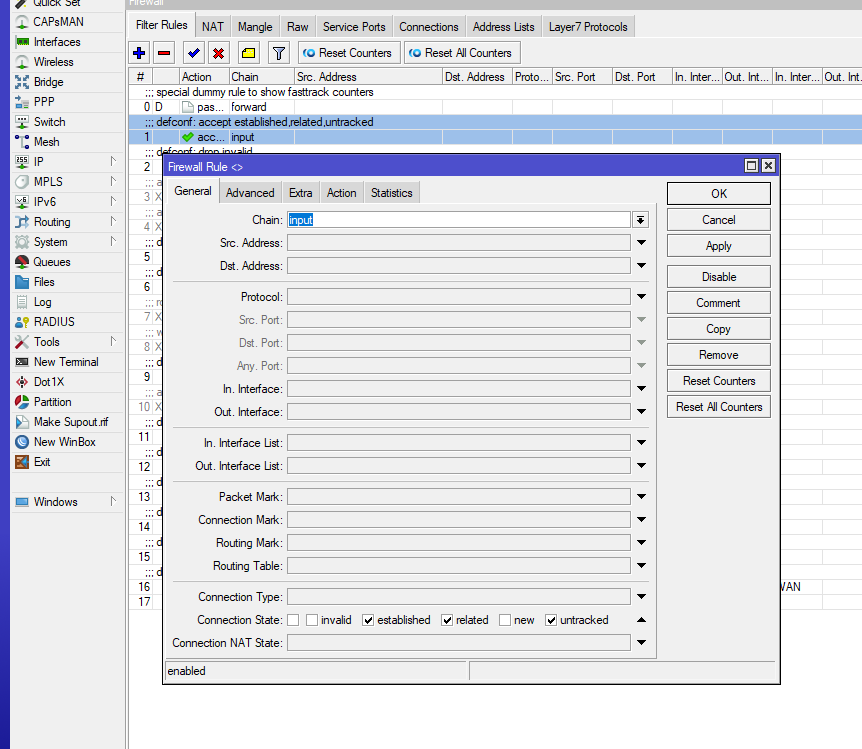
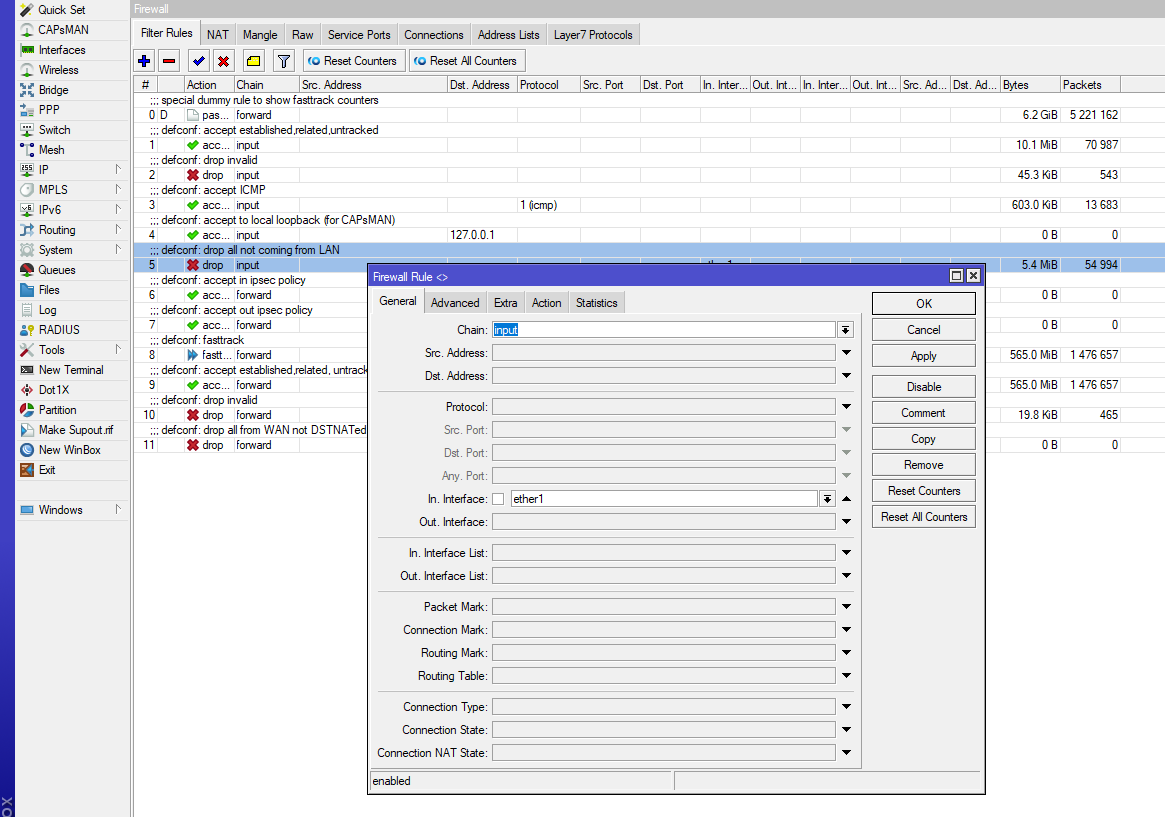
Set up Firewall. Section “IP - Firewall - Filter Rules”. Let's add a rule (if not by default) to allow traffic of already established connections (“Action” should be “accept” in this case) and drag it to the top.
Let's slightly change the rule for allowing ping (if it doesn't exist, we'll create it). In the “General” tab, select protocol No. 1 icmp and in “Advanced” we will limit the packet size to 100 bytes.

Block all other incoming traffic with the following rule. "Action" must be "drop". Drag it to the very bottom of all Input rules.
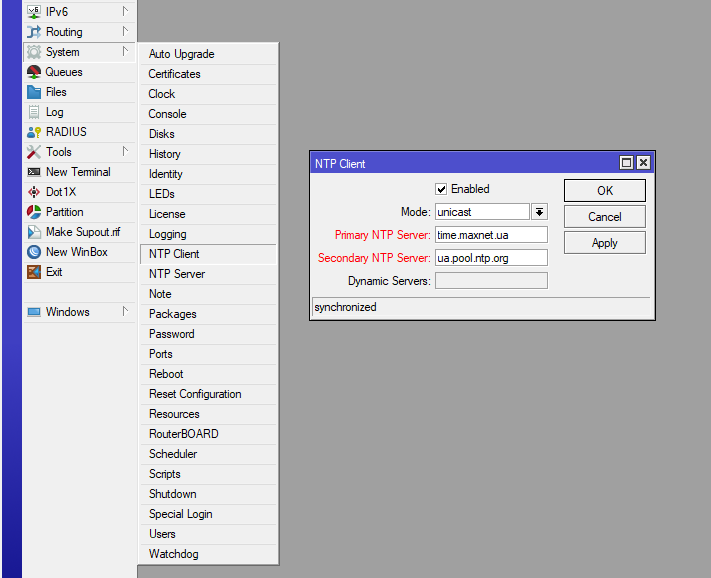
To configure the time and servers for time synchronization, go to “System - NTP Client”. Let's specify two servers for time synchronization, for example, time.maxnet.ua and ua.pool.ntp.org.
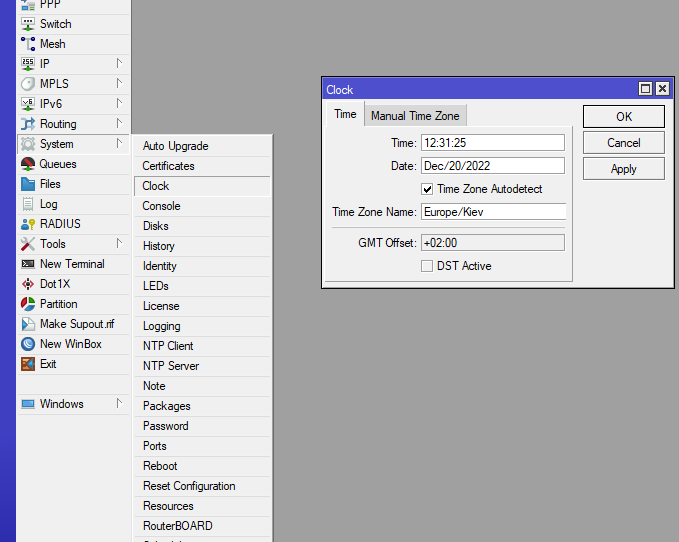
In “System - Clock” select the time zone.
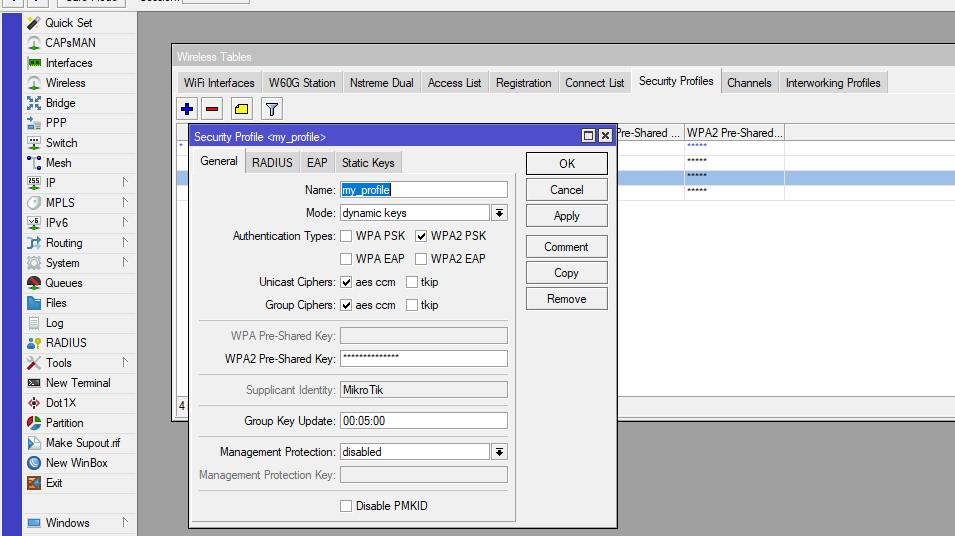
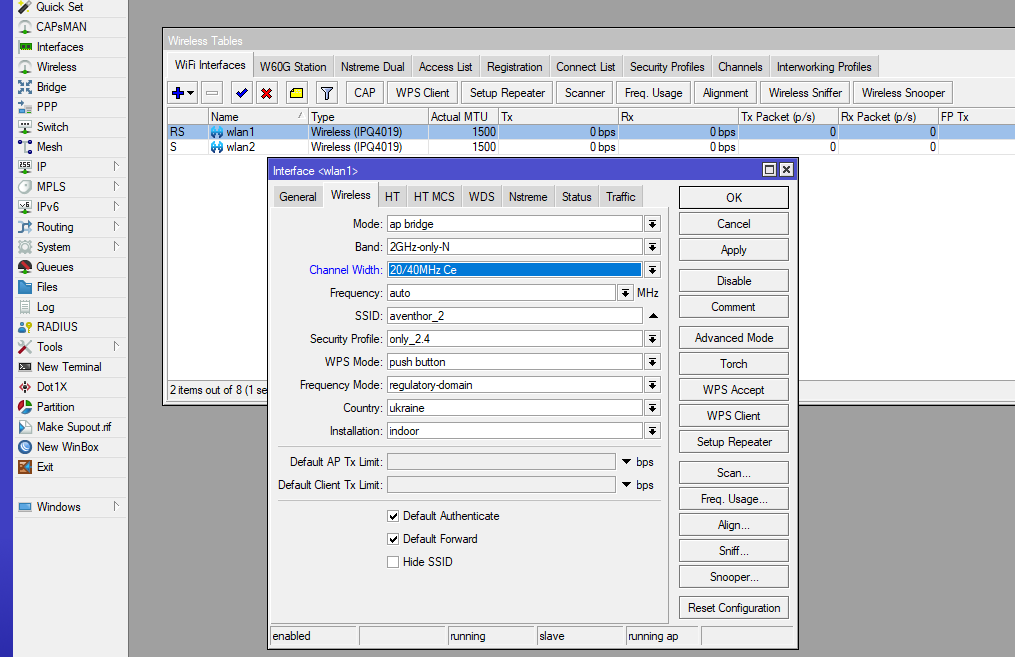
Set up a Wi-Fi network. In the “Wireless” section, we will create a profile for authorizing Wi-Fi clients. Select the type of authentication WPA2PSK, AES encryption. In the “WPA2 Pre-Shared Key” field, enter the password for the Wi-Fi network.
Next, set up a 2 GHZ network. In the “Wireless” section, select “Wi-Fi interfaces” and select the first one in the list. Band select only N or B / G / N (if there are, for example, old laptops that may not be able to work on the N standard). In “SSID” we enter the name of the network, and in “Security Profile” we select the newly created profile.
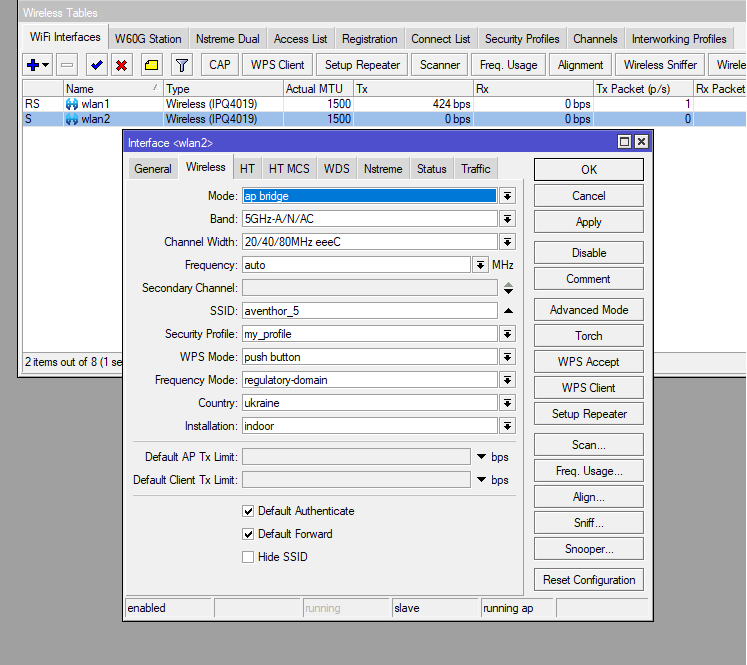
We do the same for the second interface (5GHz). Band choose A/N/AC.
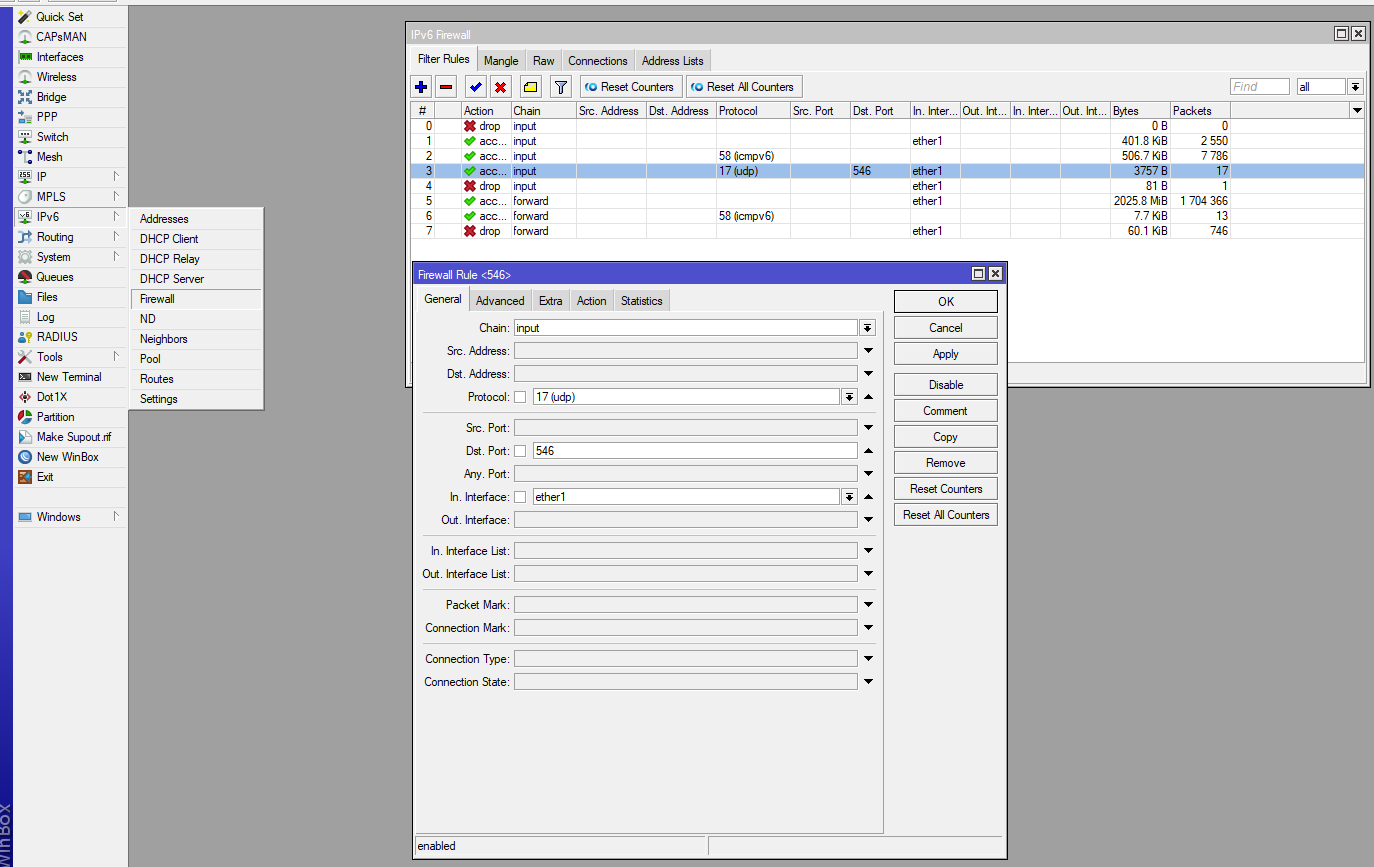
Let's go to "IPv6 - Firewall". And set up the general rules:
- We leave the standard rule to prohibit Invalid connections (when the router cannot determine the type of traffic).
- We leave the standard rule for allowing already established connections.
- We leave the standard rule for allowing ping.
- Add a rule to allow DHCP packets (udp, destination port 546, action accept).
- Add a blocking rule for the rest of the traffic.
- We repeat points 2,3,5 only for the Forward chain.
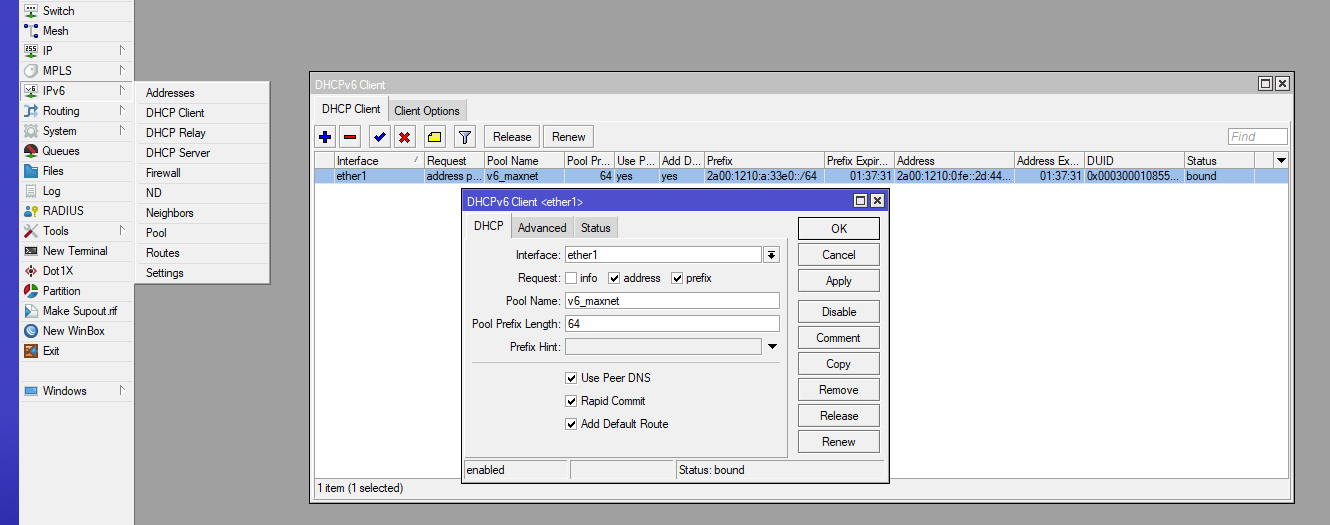
To obtain IPv6, go to the “IPv6 - DHCP-Client” section. In the interface, select ether1. Request address+prefix. In "Pool Name" enter any name for the address pool.
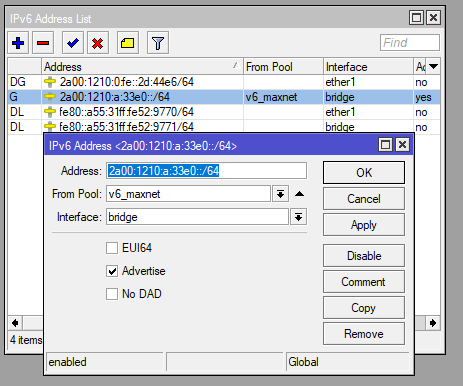
Next, from the selected pool, you need to assign an address to Bridge and enable Advertisement so that other devices on the network can receive IPv6:
More comments


Алекс
13.01.2025
2
2
Reply